Monday 25 February 2013

Butterscotch and Pear Cupcakes with Cream Cheese Icing

Oh my hat! Do you ever have days when you've got so much to do that you don't know where to start? And I'm one of those delayed-gratification types, you know - you have to unwrap the chocolate before you can eat it?!
No, seriously - I have to get the yucky stuff out of the way first before I can move onto what I really want to do. And what I really want to do is bake, decorate and write about it! If I don't get my "fix" I start to get pretty ratty.
Measuring, pouring, beating, folding, rolling, piping....aaah, sanity!

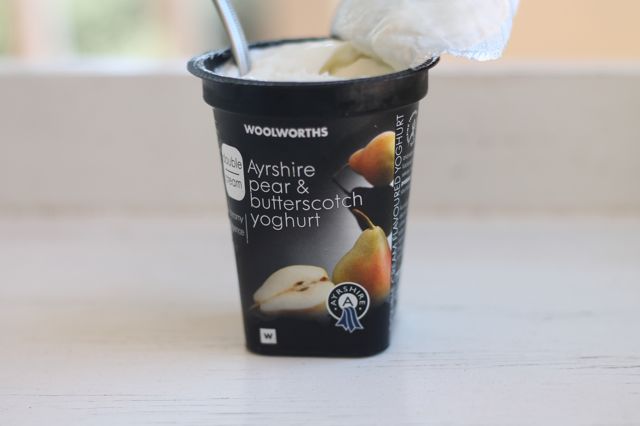
The inspiration for this ensemble came from these double cream butterscotch and pear yoghurts from Woolworths.

The recipe I used was one passed on from Nikki Palmer of Once Upon a Cupcake ( to whom I owe a huge debt of gratitude for getting me inspired to get baking and decorating).

The recipe uses yoghurt and the yoghurt tub it came in as the measuring tool for the rest of the ingredients. It actually doesn't matter what size tub you use, because as long as you use that as your measuring standard, the rest of the ingredients will be in proportion. (But using a litre of yoghurt might be pushing the boundaries! So I'll amend that to - it doesn't matter what small-sized tub you use...). These particular yoghurts are 150g / 150 ml each.

The flavour variations, as you can imagine, are dependent on whatever yoghurt flavours you can find. The Woolworths (*and they don't sponsor me to say this!!) double cream range is really great for this purpose: lemon curd, strawberries and cream, blueberry cheesecake, and this one - which I saw for the first time just before I made these cupcakes:

Butterscotch and Pear Cupcakes with Cream Cheese Icing.


..and how about some made-from-scratch butterscotch sauce to pour even more yumminess over the combo...

Butterscotch Sauce

85g butter
30ml brown sugar
40ml golden syrup
40ml cream
1tsp vanilla extract ( or 8-10 drops of Vanilla Girl vanilla)

Melt the butter, syrup and sugar together in a saucepan. Stir constantly  until all the sugar granules have melted.
Add the cream and vanilla. Mix well.
Boil for 3 minutes.
Stir occasionally.

Don't let the sauce boil for too long - this will make it stiff and sticky, and then you'll just have to dig it out with a spoon and eat it like toffee. Hmmm, maybe not such a big problem. Ok, focus...

Allow to cool before pouring onto cream cheese frosting. (If you've refrigerated it, just soften the sauce by heating in the microwave for a few seconds.)


Cream cheese icing (enough for 24 cupcakes, halve it for 12)

2 x 250g tubs cream cheese, chilled (the dense variety - like Woolworths **, or Lancewood brand)
200g butter at room temp
1 1/4 cup icing sugar, sifted
Vanilla extract

Beat together icing sugar and butter until smooth.
Add cream cheese and vanilla and beat until mixed. Pipe onto cooled cupcakes.


Butterscotch & Pear Yoghurt cupcakes (makes 24)

Use the yoghurt tub to measure the ingredients

2 tubs yoghurt (now rinse and dry 1 of these tubs to use to measure the dry ingredients)
1 tub oil
2 tubs sugar
Vanilla extract 1tsp, or 8-19 drops if using Vanilla Girl
3 eggs
3 tubs self-raising flour


Pre-heat oven to 160'C
Line muffin tins with cupcake cases

Mix together first 4 ingredients, then add eggs 1 at a time. Beat well after each addition.
Sift in flour. Fold in until just incorporated.
Spoon into prepared tins (about 1/3 - 1/2 full)
Bake at 160'C for 20 min.
Remove from tins, and allow to cool before icing.


Okay, now back to some admin and chores before I can return here...

See you soon!

xxM 

Monday 18 February 2013

Fondant Miffy Tutorial

I'm a little off colour today, so please excuse the quality of the photos (and the squishy looking body in the 2nd to last picture - I forgot to add tylose powder!). But it has been so long since I posted a tutorial, that I had to follow through the compulsion to get it done today! Blame it on my fevered brain ; )

So, this is Miffy. I didn't know Miffy until about a year ago. Why, she isn't as popular in SA as Hello, Kitty, I don't know. She is really cute - albeit in a slightly lugubrious kind of way. She is Dutch, and her real name is Nijntje. Try pronounce that one!

Miffy is drawn in a minimlist style, so she is really easy to capture in sugar paste....


  1.  Add tylose powder to your fondant to make "modeling paste". See here for more details.
  2.  By hand, shape a white piece into a ball, two long ovals for ears, two small tear-drops for paws, and two larger tear drops for feet. 
  3. In another colour, shape a large tear-drop body and two smaller ones for sleeves. 
  4.  You can add a collar and button in 3rd colour, too. The collar is simply made by cutting a circle in half. Attach with a little tylose glue
  5. Use some dry spaghetti to support the head, and ears. Attach with a dab of tylose glue. 
  6. Indent the bottom of the sleeve, and attach the paw using tylose glue.
  7. Draw the eyes and mouth on with an edible marker - the ink is edible, not the marker ; ) - once the head is dry. 


xxM 

Thursday 14 February 2013

Heart-Friendly Valentines Day Cake

It's Valentine's Day! As if you didn't know ; )

So let's talk hearts today. Not chocolate or candy hearts, but real live, beating-in-your-chest kind of hearts.

This may be a huge faux pas.... talking about good nutrition on a baking blog! But in spite of all the cakes, cupcakes and cookies which come out of my oven,  we're actually pretty careful about what we eat in this family. (My husband and I voluntarily, the kids under duress!)

Let me tell you a little bit about the fats we eat:
Our cells needs fats. Our brain is 60% fat. But not all fats are created equal.
    There are good fats (poly and monounsaturated), bad fats (saturated) and ugly ones (trans-fats). The trans-fats are what you really want to be aware of. They are the hydrogenated oils that are found in packaged and processed foods, store bought cakes, cookies, pastries, etc. (Yay for home-made!)

Trans-fats help to extend the shelf-life of foods, but incorporated into your body's cell membranes - they don't help to preserve you! They result in thickened, unhealthy cell membranes - hearts, brains and bodies. Eliminate them from your diet, as far as possible. Eat saturated fats in moderation, and make sure you get in enough of the poly and mono-unsaturated fats.

Okay, have I lost you? You're still there? Well, you've earned a tea break....here's the cake :

It's a heart-friendly (as far as these things can be!)  chocolate cake.

It's contains no flour (diets high in refined carbohydrates result in raised levels of small, dense LDL cholesterol - not good!)
It's packed with anti-oxidants from the dark chocolate and cocoa,  and good monounsaturated fats from the almond flour, with just a little butter.
 Yes, it has eggs in it - but it's a fallacy that eggs give you cholesterol problems. Eggs are high in cholesterol, but they don't actually cause raised cholesterol.
 Sugar of course is an issue, but hey....what would a cake be without sugar? Not really a cake, I guess!


Heart-Friendly Valentines Day Chocolate Cake
recipe by Tea, Cake and Create

300g dark/ bittersweet chocolate, chopped into small pieces
20g butter
1cup brown sugar
6 eggs *
1cup almond meal/ ground almonds
2/3 cup unsweetened cocoa powder
1 tsp Vanilla extract ( I use Vanilla Girl vanilla; 8-10 drops. And that is full of its own health                 benefits. A topic for another day.)

* now might be a good time to mention that I always use free-range eggs.
They make my heart happy : )

No mixer is needed - it's all done by hand. Upper body cardio!

Pre-heat the oven to 160'C. Grease and line 2 x 6-inch cake tins.


Meat the chocolate and butter together in double boiler. Do not let any water come into contact with the chocolate. Stir frequently to make sure the chocolate is completely melted.
Allow it to cool slightly, and whisk smooth.
Add the sugar, stir well.
Add the eggs - whisk in one at a time; then the vanilla.
Sift in the almond meal and cocoa. Whisk.

Pour into the prepared cake tins.

Bake at 160'C for 45-50 minutes, until the centre of the cake is firm.

Cool in the tins, then turn onto a cooling rack.

Sandwich the layers together with blueberry jam (more anti-oxidants!) strawberry jam, whipped cream, ganache, a mix there-of, or any frosting of your choice.
The surface just needs a dusting of icing sugar.


Happy Hearts' Day!

xxM

Monday 11 February 2013

Humidity and Royal Icing - Re-cap

Can we talk about the weather?!
A very humid and clammy day on Saturday was followed by a huge thunderstorm in the early hours of Sunday morning. The thunder and lightning - which was striking all around us along the valley, lasted for hours. So on Sunday, we were without electricity for most of the day. Today, humidity is officially sitting at 70%, but it feels more like 90%.
Okay, so this isn't a meteorological blog....but when you are working with royal icing and fondant, you can become a little obsessed with the weather. Especially when it's bad. And humidity = bad weather. Bad. Bad. Bad.

So here's a  re-cap on 2 posts I wrote early in Spring on the subject

www.teacakeandcreate.blogspot.com/2012/08/humidity-and-royal-icing.html

www.teacakeandcreate.blogspot.com/2012/10/cloudy-with-rain.html

What I've been doing in this kind of weather, is putting my decorated cookies into the oven, with the fan on an a tiny smidgeon of heat, to dry them out completely. Then I package them in sealed cellophane bags, or in an airtight container between layers of paper towel.

 If you leave a decorated biscuit out in high humidity - even if it has already dried completely - this is what happens:


Before


After

... if you could see it close-up, you'd see that the icing has become completely dull and pitted. And, of course, the cookie itself is soft and soggy.

Wishing you good - baking weather days!

xxM


Saturday 9 February 2013

Blueberry and Lemon Cupcakes


When my mind gets going on a track - its pretty hard to derail me.
So, after the black cherry and chocolate cupcakes, I still hadn't (and probably still haven't) got the jam/ preserves secret centres out of my system. Scanning the jam shelves, I was inspired to try this next one:

Lemon and blueberry cupcakes. But the blueberries are all "jammed" in the centre ; )


They are lemon and vanilla cupcakes with a hidden centre of blueberry preserves (I use Bon Maman Wild Blueberry Preserves) with lemon and blueberry Swiss meringue buttercream.

Yes - SMB, again! Have you tried making it yet? I think one of the reasons I enjoy it so much - not just because of the taste (which is scrumptious!) is because it does this whole "ugly duckling" transformation thing.
I made the SMB a day before, then took it out the fridge to re-whip: this is what it turned into.
 Really not very pretty.


So I removed a small portion and heated it in the microwave for 30sec....


Still not very promising, hey? It was so bad, that I actually had to leave the room.
Just kidding...I left to go haul Jack and Sabrina in to bath. Then, forgot about the SMB beating away in the kitchen.
 When I returned - the ugly duckling had transformed into a swan!
I was so excited relieved that I forgot to take a photo, and just quickly piped it onto the cupcakes before it could change its mind!

So here's a photo of the final product:


                                                           Extreme makeover!!


Lemon Vanilla Cupcakes
recipe adapted from Paper Eskimo

Preheat oven to 160'C. Line 2 x 12hole muffin pans with cupcake cases


4 eggs
300ml sour cream
1/2 cups caster sugar
2 cups self-raising flour
1 tsp Vanilla extract (you know I use Vanilla Girl - just a few drops)
Zest of 1 lemon


Beat together the eggs and cream. Then add the sugar and vanilla. Beat for 4 minutes.
Add the zest and sift in the flour. Beat briefly until smooth.

Pour batter into prepared cupcake cases. Bake for 15 - 20 minutes.
Remove from muffin pans and allow to cool.

Spoon the preserves into a piping bag fitted with a large round nozzle. Stick the nozzle into the middle of the cupcake, and squeeze!


Lemon and Blueberry Swiss Meringue Buttercream

5 large egg whites
1cup + 2 TBS castor sugar
340g butter, cut into cubes, at room temp
Lemon extract (I also use Vanilla Girl lemon extract - new on the market)
2 heaped TBS Blueberry preserves


Put the egg whites and sugar into a mixing bowl, and place that over a suitable saucepan of simmering water. The bottom of the mixing bowl must not be in contact with the water, and the water should not be boiling.


Whisk constantly, until the sugar granules have dissolved and the mixture is hot to touch.

Move off the stove, and to the mixer.
Using the whisk attachment, whip until it forms a thick and glossy meringue.

When the mixing bowl feels neutral to touch (ie, no longer hot), change over to the paddle attachment, and add the butter one cube at a time.
It may curdle, but just keep whipping until it reaches a satiny smooth consistency and holds its shape. Add the lemon extract, and blueberry preserves, beat well to incorporate.

Pipe onto cooled cupcakes.


Enjoy!

xxM 


PS. For a fresh blueberry cupcake recipe, go here.

Tuesday 5 February 2013

White Chocolate Vanilla and Fig Cake

It is entirely possible that my previous effort at an Ombré Cake has left me a little scarred. Running out of icing with a third of the cake still to go that time, made me doubly prepared this time. Actually triple-prepared: I was making ombré hearts to cover the cake, and where 60 would have done the job, I must have cut out about 180. Definitely over-prepared. And then we had such damp and misty weather again, that the hearts took two days to dry under ceiling fans going at maximum speed. After all that, I produced a cute little cake - but nothing like what I'd had in mind. The artistic gap - the difference between what you have in mind, and what you actually produce. Ho - hum. Frustrating.
I guess it narrows as you grow in experience and skill. Some days, though, the gap feels like the Grand Canyon!


Ah, well practice and perseverance.

Anyway...
This is how I do "ombré" - I start with 2 or 3 base colours and then use those to create the other shades, instead of mixing each colour from scratch individually - the shades are blended from the base colours.


Underneath all those hearts was a rather delicious blend of white chocolate vanilla cake, ganache and figs; and it's what is inside that counts : )


White Chocolate Ganache

300g white chocolate
100ml cream.


Place the white chocolate and cream in a heatproof bowl over simmering water. (Do not let the bowl come in direct contact with the water).  
Stir occasionally until all the chocolate is melted.

Allow to cool and firm up before using.


White Chocolate Vanilla Cake:
(adapted from this basic vanilla cupcake recipe)
Recipe by Tea, Cake & Create

Prepare and grease 2 x 8inch baking tins, or 3x 6inch tins
Preheat the oven to 170'C

1cup milk
1/4 cup vegetable oil
250g white chocolate - chopped into small pieces.
1cup caster sugar
4 eggs
2 cups cake flour
1tsp Vanilla extract ( I use Vanilla Girl vanilla, so just a few drops)
1/2 tsp salt
2tsp baking powder

Heat the milk and oil together in the microwave for 2 minutes on high power.
Pour the hot mixture over the chopped chocolate, stir to melt all the pieces completely.

Beat the sugar and eggs together for 6 minutes on medium-high speed.

Add the vanilla extract.

Sift the flour, salt and baking powder into another bowl.

With the mixer on low speed, alternate adding the flour and milk/chocolate mixture to the beaten eggs and sugar, beginning and ending with the dry ingredients.


Pour the batter into the prepared pans.

Bake at 170'C for 35minutes, or until a skewer comes out clean.

Allow to cool. Then cut each cake layer horizontally into 2.

Alternate filling between the layers with good quality fig jam, and white chocolate ganache. 


I hope you're planning something "love-ly" to enter into the competition ; )

xxM


Sunday 3 February 2013

February Competition!

I'm so very excited to be announcing this - Tea, Cake and Create's first competition


For further information and guidelines go to this page


I hope you're going to enter! 

xxM 

Friday 1 February 2013

Pinwheel Cookies

I was watching a nature program with my children the other day, thinking about how odd-looking Australian animals are, when it struck me ... Ahem, as if giraffes and zebra and rhinos aren't also a little crazy looking?! Just because we grew up with them - obviously not literally! - in our back yards, they seem normal and right. Kangaroos and duck-billed platypus(ses??) , on the other hand... not so normal. No offense intended!

Ok, there's really no point to that little share, except that these biscuits make me think of zebra crossings, and zebra crossings make me think about zebras, and well, you can figure out the rest....


Pinwheel ( Zebra) Biscuits:

All you need is some cookie dough from this Vanilla Cookie Recipe and some Dark Chocolate Cookie dough.


Roll out equal sized rectangles of each dough.


Lay them on top of each other


Roll it into a sausage shape.


Wrap in cling-wrap.

Refrigerate.

Cut into slices.

Bake at 180'C for 10-12 minutes - depending on how large and thick your slices are.

No further decorating necessary. They're good-looking just the way they are!


Very South African, aren't they? We should call them Reconciliation Cookies : )

xxM