Saturday, 25 November 2017

Monster Cupcakes - Royal Icing Eyes

Silly season... 
It's busy, isn't it?! 
But it's not just all the countdown-to-Christmas stuff; it's the squeeze-everything-into-the-year-that-hasn't-yet-been-done stuff, too. 

And it would also be when my daughter's teacher and the intern both have their birthdays! 
So this is what I made for the class to celebrate the intern's birthday:


I did reassure the moms that the fact that they were monster cupcakes was no reflection on our children. (Probably more a reflection on my state of mind at this time of year...)

I wasn't up to the task of rolling 24 pairs of googly fondant eyes, so made these out of royal icing instead:


Royal icing eyes:

Pipe rounds of white with just-thicker than flood-consistency royal icing, followed immediately by a smaller round of black on top, and a dot of white for the flash of light in the eye.

Allow to dry completely before removing from the baking parchment and placing onto the monsters.


The buttercream on the cupcakes is piped with the grass nozzle - Ateco 133, and the little bows are made from a modelling chocolate / fondant blend.


For the teacher's birthday I made them chocolate-glazed mini donuts. You can see those here on Instagram. 

Ok, so a couple more things done for the year  ✓✓ 
Phew!

Happy decorating!

xxM 

Saturday, 18 November 2017

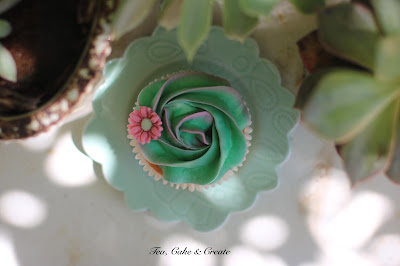
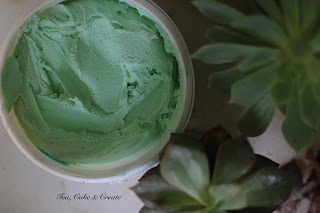
Antique Green Buttercream

Am I reluctant to leave these cupcakes from our Roses and Succulents class behind? 
Oh, yes.
 Because the only classes left for the year are Christmas themes. Christmas, Christmas, and more Christmas! 
Which I am actually really looking forward to... But really, Christmas?! 🙈

So, before we move onto all things Christmas, a final bit about these cupcakes...


To get "succulent" green for the pastes (see the previous post for pictures) I did my usual trick of adding a touch (just a tiny touch) of black to antique the shade.
 But I was wary of doing that with the buttercream, so I used a bit of purple instead. 
If you've ever washed black gel colour off anything, you'd have seen how much purple there is in black. So I knew that it would take me in the colour direction I wanted without making the buttercream look too flat and grey (and inedible!). 
Also, purple minimises yellow tones, which is helpful with buttercream because of its inherent warm undertones. 


This buttercream is coloured with leaf green, turquoise and a little regal purple (all Cake Flora or Americolor gel colours).

To get the subtle two-tone effect, smear just the inside of the piping bag with light purple buttercream, and then fill the bag with the green.


 Pretty huh?

Happy decorating!

xxM

Thursday, 16 November 2017

Roses & Succulents Cupcakes

I made cupcakes similar to these back in June for a private class. And thought then that I should include them in the general schedule for later in the year. And now later has arrived. A lot sooner than anticipated!


Are you also asking yourself - Where has this last half of the year gone?!
Do we say that every year, or is each one speeding up exponentially (until we'll be baking our Easter cupcakes at the same time as our Christmas cookies?!)

So, let's just pause and smell the roses for a minute.
Or better, make a sugar succulent to go with those roses... 😉


For this mini succulent, the paste used is CMC or Tylose paste, coloured with mint green, turquoise and black (just a drop of each!)

  • Roll the paste out thin. (Yes, succulents are fleshly, but still - make it a thin, ok?!) 
  • Cut out 2 of the largest blossoms, and one each of the medium and small. 
  • Use a bone or ball tool and a foam pad to cup the petals. 
  • Pinch the tip of each petal with your fingers. 
  • Place a large blossom in a flower former/ egg tray with a dab of tylose / CMC glue in the centre. 
  • Stack the next large one on top, positioned so that the petals (are they petals or leaves?) are in the gaps created by the previous layer's petals.  
  • Repeat with the medium blossom. (Remember the glue in the centre). 
  • Pinch the smallest blossom at its base so that it resembles the tight centre of a succulent.  Glue it in place. 
  • If you need to create a bit of space between layers of petals, use small rolled up pieces of paper towel to support them as they dry. 
  • Once completely dry, dust the edges of the petals with purple dusting colour. 
  •  Place onto a fondant disc, or directly onto a swirl of buttercream 


Happy decorating!

xxM