Thursday, 23 June 2016

Stencilled Plaque Cookies

I made a batch of cookie dough with every intention of doing some recreational baking and decorating, but between hospital work; hospital visits; vet visits, and the school play, time has been in  very short supply this week.
And while cookie dough freezes well, my need-to-create doesn't (it's a recreational habit, not an addiction. Really!) so I'm feeling stymied at the moment. 
I'll just have to channel that creative urge into writing about it, instead.
Those that can, do; those that can't, blog about it...!  
(You know that I don't really mean that!) 

So, when time is short (as it so often is these days), it's handy to have a few decorating short-cuts you can turn to. 


Flooded cookies (dried), stencils, luster spray and edible decorations made in silicone moulds ...


...is all you need to make these pretty cookies. 


See how I apply the luster spray here, and how to use a silicone mould here. (Note that in that tutorial I was using CMC paste in the mould, but I used a modelling chocolate/ fondant blend to make these flowers and frames.) 


Happy decorating! 

xxM 

Sunday, 19 June 2016

Gluten Free Brownies


Confession - a lot of the time I just wing it. Honestly, truly. 
I read a snippet of the instructions or directions, decide that's enough and dive in from there. (And then go searching on Google or YouTube to find out how I should have done it!). 
I'm not impetuous, just impatient! 

So that's been the way I've approached baking with coconut flour...
I read somewhere (briefly), that you couldn't simply substitute coconut flour for normal flour; it absorbs a lot of moisture, so you have to compensate for that. And I'd tasted a delicious, but crumbly-to-the-point-of-falling-apart loaf that a friend had made using coconut flour. So I knew that crumbling could be an issue. (Or a benefit ... Here's the Pear and Pecan Crumble  I made using coconut flour). That was enough data. I was ready to take the plunge! 

Because brownies require so little flour, and have an inherent stickiness from all that chocolate, they seemed like a good recipe to experiment with. 
And it worked - no need to turn to Google or YouTube! 🤓


You can't go wrong with the flavor combination of chocolate, coconut and banana. But the bananas are an especially great addition here, because they add extra moisture and binding to the mixture. 
So I've used my standard brownie recipe, added an extra egg, a little more butter, the bananas, and of course the coconut flour. Yum yum yum!
(If you don't like the taste of banana in your deserts - What?!! - then substitute apricot jam, like I did in these brownies.)


Gluten Free Brownies

Recipe by Tea, Cake & Create

Preheat the oven to 180'C
Grease and line a brownie pan.  
(I line the pan with 2 sheets of baking parchment placed at right angles to each other, forming a cross. This makes lifting the cooled brownies out of the pan very easy). 

Ingredients:
400g dark chocolate, cut into small even-sized pieces 
100g butter
4 XL eggs
100g caster sugar
70g coconut flour 
2 ripe bananas, mashed 
1 tsp vanilla extract
1/2 tsp coconut flavoring*
* (optional... you don't often don't taste the coconut from the coconut flour once it's baked, but I didn't want to lose that part of the flavor trio here). 


Method:
Melt together the chocolate and butter. Cool slightly. 

Beat the eggs and sugar until light and creamy. Add in the vanilla and coconut flavor.  

Pour the melted chocolate/ butter mix into the egg mixture. Beat until smooth. 

{**One of the things I love about brownies (let's admit is - there are many things to love about brownies, and this might not be top of your list, but it's right up there for me!)  is that even if the chocolate / butter mix looks like it has seized - all lumpy and unco-operative - when you add it to the eggs, it smoothes out beautifully. Magic!}

Mix in the mashed banana, then sift in the coconut flour. 
Beat until well incorporated. 

Pour the batter into the prepared pan.  

Bake for approx 35 minutes.  A cake tester inserted into the middle of the brownies should come out with sticky crumbs attached, not wet batter and not clean.  

Allow to cool before removing from the pan and cutting into squares, or triangles.  


Gluten-free banana and coconut brownies that are so good that you won't even want to wait for a gluten-free reason to bake them! 

Happy baking! 

xxM 

Monday, 13 June 2016

Enchanted Woods Themed Moss-covered Cupcakes

Ok, I think I've got it out my system - all this woodlands stuff.

Well, until next March, at least.
I might just have convinced my daughter to have Enchanted Woods as her next birthday party theme...
{insert big grinning emoji here!}


I've even gone so far as to get a friend, who is now living in Chicago, to go across to her local Michaels craft store (which is apparently 2 minutes away from her - I'm sooo jealous!) and get me a moss table runner in preparation for the party (Yes, if you're counting - it is 9 months away).
Presumptuous? Obsessive? Call it what you like, I consider it forward planning...!


But, I admit it is a little obsessive. I can't stop myself, though. I love moss! Both real and edible. (Um. It's possible that there isn't a difference between the two. Especially if you're a reindeer...)


You might remember that we used cookie moss a few months ago for our Easter creations. It worked beautifully, but unfortunately the green food colouring didn't colour just the cookie crumbs. 
Green teeth aren't cool. Funny maybe. But not cool. 


So, this time I made it a little differently. 
Here's how: 

                        
Colour a small amount of cookie dough green; roll it out thinly and cut it into randomly shaped pieces. Bake. 
(The baking turns the cookies a perfect organic-looking mossy green... Possibly because these were slightly over-baked ... oops!) 
After the cookie shards cool,  process them until fine.


Then create a dome of buttercream on your cupcake and dip it in the crumbs. That's it.
 Cookie moss for cupcakes. No green teeth. So much better! 


Happy moss-making!

xxM 

Monday, 6 June 2016

Pear & Pecan Crumble

Well, I didn't get around to making a Sunday roast this past weekend.
(That might suggest that I usually do make a Sunday roast. I don't. Just thought I'd clarify that.)
But I did make a crumble.
And that's good enough.
Actually it's more than good - it's great!
 I'm crazy about this crumble topping - so crispy, crunchy and full of flavour.
And so simple. Which is what you want for a lazy Sunday  - so there's no excuse to not have desert.


Pear and Pecan Crumble
Recipe by Tea, Cake & Create

Filling:

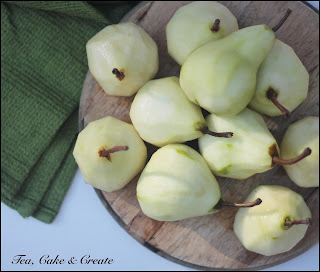
8-10 ripe pears, cut into chunks**
1 tbs brown sugar
1 tsp ground ginger

**If the pears are hard, simmer the chunks until just beginning to soften (in 80ml or water for approx 5 minutes). Drain off all the water before placing into your oven dish. If you prefer less fruit to crumble ratio, only use 6 pears.


Crumble topping:

1/3 cup butter, melted
1/3 cup brown sugar
1/3 cup plain flour
1/3 cup coconut flour
1/3 cup almond flour (ground almonds)
1/3 cup raw rolled oats
1/3 cup finely chopped pecan nuts
A pinch of salt.


Method:

Pre-heat the oven to 180'C

Mix the filling ingredients together and place into an oven dish (I'm using one here that is approx. the size of a loaf pan).

Mix all the crumble ingredients together, and spread evenly over the top of the pears.

Bake at 180'C for 30-35minutes, until the crumble is a rich golden brown.

Remove from the oven and serve warm with fresh cream.


I usually prefer measurements in grams, but when you read the topping ingredients, you'll have seen why I've stuck to cup measures. Didn't I say it was simple?
And of course you don't need to use pears; add this crumble topping to any fruit base of your choice.


There. Pudding done. Roast optional ;o)

Happy baking!

xxM