Monday, 25 March 2019

Pineapple Cake Topper

If you're a homebody like me, coming back from holiday is always a bittersweet occasion. 
I love the familiarity of home, but it also means back to work, back to housework, and back to a list of things to do that were put away in the to-be-done-after-the-holiday file. 
Oh, boy. 
I need another holiday already!


 Some of those those tasks, though, are more pleasurable than others (the most daunting on the list is a trip to home affairs to find a long-overdue document). So, let's continue wrapping up some of the loose ends from Sabrina's pineapple-themed party. 

You might've thought I'd make an actual pineapple cake, but no - it was a pretty pink creation, with "confetti" and a gold pineapple topper - inspired by the birthday invitation. 


The topper is made from CMC / tylose paste. The underlying layer is white, with an embossed gold-lustered layer placed on top of that. 
1. cut the pineapple out of white CMC paste. 
2. use the “cling-wrap on top method” to do this - it gives the cutout more rounded edges (4).
3. place a long cocktail stick through the base of the pineapple. 
4. see... rounded edges 😉
5. roll out and emboss some light yellow CMC paste, and cut out another pineapple. 
6. luster this with gold powder. 
7. use small square or diamond shaped cutters to cut up the pineapple. Free-hand cut the leaves. 
8. re-assemble the pieces on the base pineapple. 
9. use CMC glue to stick them in place. 
10. add a few flowers to complete the topper. Leave to dry completely before using on a cake. 

In case you missed it on Instagram, here's a quick video on how to make the mini frangipanis... 


Happy decorating!

xxM

Sunday, 24 March 2019

Stencilled Pineapple Cookies

And we're back!

Our holiday felt like endless days of sun and sea.
And then suddenly it was all over!

We came straight back into piles of washing, no electricity (load shedding), and today... no water (a burst pipe.) Aargh!
Reality bites back!

So, let's rather think back to the happy days before we even left on holiday - and talk pineapple party...


I promised more pineapple cookies. And here they are, including a quick video - in case you missed it on IG or Facebook. 


I really enjoyed making these. The stencilling worked out well - much to my relief!
It was so much easier than piping a pineapple pattern, and a quick and easy way to incorporate gold into the design. (There had to be gold in the design!)


The girls loved the decorated cookies at the party - choosing them first out of all the treats. 
Pineapple power!

Happy decorating. 😊

xxM 

Tuesday, 12 March 2019

Confetti Cookies

March didn't start out well. I caught this damn virus from my damn darling kids. And all energy and motivation fled in the face of it.
But thankfully it wasn't the kind of virus that was here to stay, and I picked myself up and got cracking with party prep. Yes, March means my "little" girl is a year older and we have cakes and cookies to bake.

So Sweet! Divine 9. 

This year's theme... can you guess?

Ok, I'll tell you. It's "Party like a Pineapple".

Its choice was prompted by the fact that we leave for an island holiday the day after the party (happy dance!)

How exactly a pineapple parties, though, I'm not sure.
But, as I said on Instagram, I love this advice for a young girl:


(...that, and it helps to have a thick skin and a few don't mess with me spikes 😉)

So, all said - I'm really enjoying this theme.

Here's how to make the confetti cookies background:


Or, perhaps a video explains it better...


More pine-9-apple cookies coming soon!


Happy decorating!

xxM

Tuesday, 5 March 2019

Forest Friends Cupcakes

 You know I need my woodlands creatures fix - at least once a year. So while I was planning on teaching standard swirls and flowers for the "Basic Buttercream" cupcake class, I somehow got sidetracked by these guys. But the classes were better off for it!


It started with the fawn, top right, inspired by Christina's Cupcakes. Soon followed by fox and hedgehog. Then it dawned on me that with Easter coming, we might as well bring some bunnies to the picnic.


Bunny fluff and hedgehog spines are piped with the Ateco grass nozzle - tip 133. 
The fox is piped with a small closed star nozzle - an Ateco 28. 


Before adding the fur and spines, though, it helps to have an idea of where not to pipe. 

To demarcate the foxes muzzle, use a round cutter to indent crescents into the buttercream:


And to outline the hedgehog's facial area, use a heart cutter.  


Ears, eyes, noses, etc are made from a fondant / modelling chocolate  CMC paste blend. 


And that was that. Basic buttercream and sugar paste techniques sorted. We actually did pipe swirls and flowers, too - but the stars of the show were definitely the furry forest friends!


Happy decorating!

xxM 

Monday, 25 February 2019

Dark Chocolate Cupcakes with Salted Caramel Centres and Caramel Popcorn


What could possibly be better than dark chocolate cupcakes filled with salted caramel, decked with cream cheese frosting?

I'll tell you what - throwing some home-made caramel popcorn into the equation! 
The biggest problem with making caramel popcorn? It’s not the volcanically hot caramel sauce you’ll be working with, no  - but rather the temptation to try a piece or 20 along the way. And before you know it, you’re going to have to make a second batch! 


Caramel popcorn is ridiculously more-ish.  
The idea that we have different sections of our tongues devoted to different tastes is actually incorrect, but there’s no doubt that something that is sweet and salty at the same time, tickles all the taste buds! 


You'll find the recipe for dark chocolate cupcakes and salted caramel here:http://teacakeandcreate.blogspot.com/2014/04/dark-chocolate-cupcakes-with-salted.html And for  cream cheese icing here:
http://teacakeandcreate.blogspot.com/2012/07/cream-cheese-icing-chocolate-cream.html

But right here, right now .... here's the recipe for caramel popcorn:


Caramel Popcorn 

Ingredients:

180g caster sugar 
110g butter
25g golden syrup 
2ml bicarbonate of soda / baking soda 
Vanilla extract 

+/- 70g  popped popcorn*, well salted   


(* FYI 70g of popcorn kernels will give you 70g of popped popcorn. Caramel popcorn is pretty magic stuff, but we don't create or destroy matter when making it!)

Heat sugar, butter and syrup together in a saucepan on medium-high, stirring until sugar has melted. Then simmer for approximately 4-5min and just starting to turn amber (or when a sugar thermometer reaches 124'C ) Remove from heat and stir in the vanilla and bicarb. 
While the syrup is simmering, spread the popped popcorn out on 2 large baking trays lined with non-stick paper. 
Pour  the syrup over the popcorn, mix well, coating as much of the popcorn as possible. Do not be tempted to do this with your hands  🙀- the syrup is extremely hot; rather use two forks. 
Place in the oven for 8-10minutes at 180'C.  Allow to cool before you start tucking in!


Store any caramel popcorn you don't use on cupcakes in an airtight container. It'll keep for a few days. 
Until it's gone ... all gone 😿


Enjoy!
xxM 

Saturday, 9 February 2019

Choc-Chip and Orange Yoghurt Cupcakes

Oh, 2019 you're sending me mixed messages, I don't know where I stand with you. 
Can we just be friends?!

I'm feeling a bit nostalgic for 2018 . Can you tell? 
Oh, the good old days. 
Life was simpler back then... 😝

Don't worry, though. I'll get the hang of this year, around March. Maybe May. 
Until then? Don't over-think it.  Chocolate helps too. 

Cue choc-chip cupcakes....


I re-visit this recipe every couple of years - it's got so many possibilities, and it never disappoints. 
(Now that's comforting!)

You use yoghurt in the recipe, and then use the yoghurt tub to measure the ingredients. 
A "tub" being a little yoghurt cup, but not the little little * yoghurt cup - 150g, or 175g will do.  

(*Definition of little little: the ones that you'd finish off in 2 spoonfuls as an adult, but seem to contain litres of yoghurt when they get spilled on your child's clothes or in a school lunch box ....)


I've used full cream choc-chip yoghurt to make these, plus extra chocolate, and some orange zest. It's a flavour pairing I use often - comfort food, I tell you - but I know that not everyone loves citrus with their chocolate, so omit it if you must. (But really, though - only if you must!).


Choc-Chip and Orange Yoghurt  Cupcakes

Preheat the oven to 180'C 
Line 2x 12 hole muffin trays with cupcake cases. 
If they are the larger sized muffin trays, you may only get 18 cupcakes out of this recipe. 

Ingredients
2 tubs* choc-chip yoghurt (now rinse and dry 1 of these tubs to use to measure the dry ingredients) 
1 tub oil
2 tubs caster sugar
3 eggs
1 tsp vanilla extract 
zest of 1 medium orange 

3 tubs cake flour 
1 1/2 tsp baking powder 
1 tub finely chopped dark chocolate pieces

Whisk together the wet ingredients. Add the orange zest. 
Sift in the cake flour and baking powder. Mix until smooth. 
Fold in the chocolate. 

Divide  the batter amongst the prepared cupcake cases. 
Bake at 180 ' C for approx. 20 minutes, or until they're just beginning to turn golden and spring back when touched.  


I topped some of these with a simple glaze made from icing sugar and orange juice, and a squiggle of melted chocolate. But really, they're good just as they are. 

Enjoy!

xxM

Tuesday, 29 January 2019

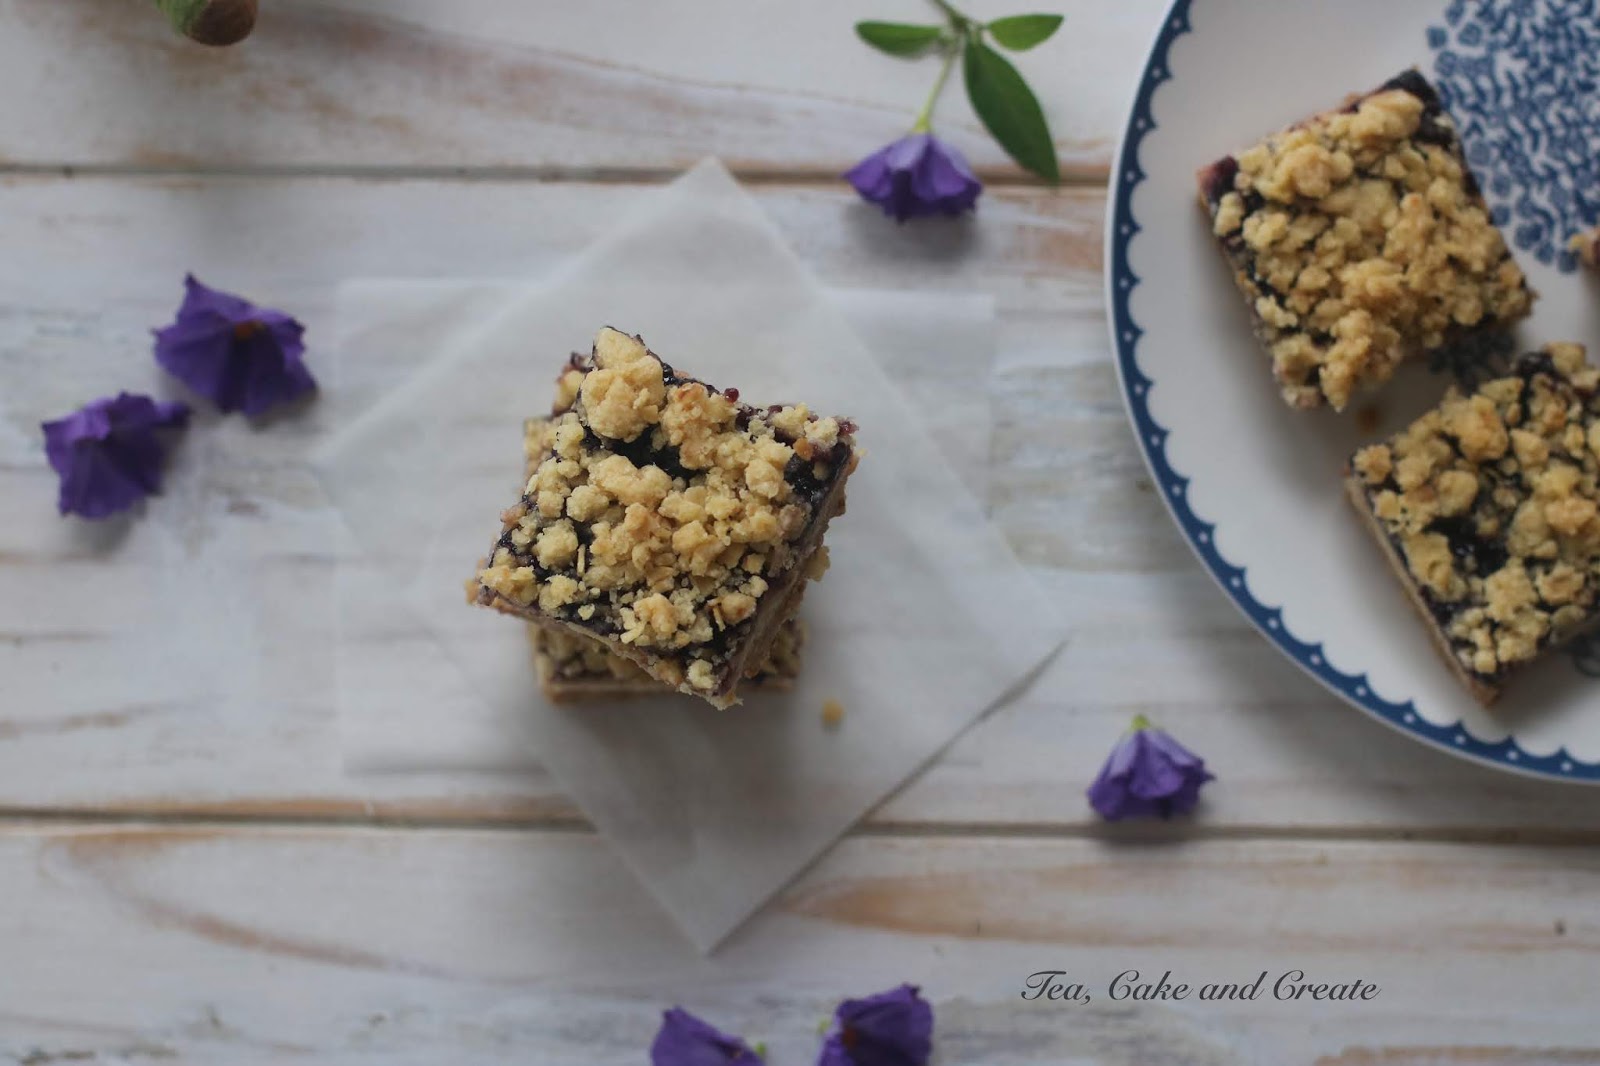
Blueberry Crumble Cheesecake Bars

First recipe share of 2019, and it's a keeper!

I love crumble. I love cheesecake. And I love the two together!  (And by I,  I mean we, right?! )

While there are a few steps here for the various layers,  you could quite easily make the base and crumble in advance, then put it all together when you're ready to make the cheesecake layer. 


A few years ago I would have proudly made the blueberry preserve from scratch, too. 
But these days, between work, kids' sports, homework, buying groceries, making meals, etc, etc *
I cut myself some slack. 
It is okay to delegate! And I've delegated the preserve-making to Bonne Maman - delicious preserves conveniently found in a jar at the local supermarket 😉

(*etc encompassing everything else we mothers do - too exhausting to list!) 


Blueberry Crumble Cheesecake Bars
recipe by Tea, Cake and Create 

Line a 22cm square cake pan with a double layer of baking parchment.
Pre-heat the oven to 160'C when starting the cheesecake preparation.


Base
200g cookie crumbs (use a food processor, or smash the cookies with a rolling pin in a ziploc bag)
40g uncooked porridge oats (not instant oats)
80g butter

Melt the butter. Stir in the cookie crumbs and oats. Press into the base of the square cake tin.
Chill in the freezer for 30min.

Crumble 

40g uncooked porridge oats (not instant oats)
60g cake flour
40g brown sugar
50g butter,  at room temp.

Use a fork, or your fingers, to mix all the crumble ingredients together. Set aside until needed.

Cheesecake Layer
2x 230g tubs medium-fat cream cheese
100g (1/2 cup) caster sugar
120ml (1/2 cup) sour cream
2 large eggs
1 tsp vanilla extract

Beat the cream cheese and caster sugar together. Add the sour cream. Mix well.
Beat in the eggs and vanilla extract.
Pour the mixture over the chilled base.
Bake at 160'C for 30 minutes.

Blueberry layer 
3/4 cup good quality blueberry preserve
Heat the preserve in a small saucepan to ease the following step:

Spread the layer of blueberry preserve on the cheesecake after it has baked for 30minutes.
Generously sprinkle the crumble on top of the blueberry layer.

Return to the oven and bake for another 30minutes.
The crumble should be light golden brown.

Remove from the oven to cool.
Refrigerate for 2-3 hours before removing from the cake pan and slicing into squares.


Try the jam layer with different preserves - strawberry, raspberry, peach... Whatever you find on the shelf 😉

Happy baking!

xxM