Friday, 20 September 2013

Sugar Paste Puppy Tutorial

Sugar paste puppy:


Here's the inspiration:


He's looking a bit bedraggled and is hung up to dry because he belongs to a 3 year old, and she decided that he needed a bath.  (Wondering why I haven't got my kids any real live pets yet...?!)
; )

You'll need:
- A ball of white fondant/ plastic icing with some tylose powder added to it.
- A small ball (less than pictured) of black fondant with tylose powder added to it.
(The official amount is 1tsp tylose powder per 250g fondant, but I just go by feel. Too little and the paste won't hold it's shape, too much and it becomes hard and cracks easily.)

-You'll also need a scallop tool - AKA a"smiley mouth" tool; a small palette knife, and some tylose glue / water and a paintbrush to apply it.


These are the basic shapes to begin with:


Then slightly elongate the legs by rolling the narrow end of the teardrop in your palm:


Position limbs on the sides of the body. Attach with a little tylose glue / water.
Place a stick of spaghetti in the body to support the head.


Roll out two small balls for ears.


Flatten them, and pinch the ends.


Position on the head - correct positioning is important. Play around with them a bit before attaching  with glue, if you are not sure.


Use the small palette knife / the blunt side of a knife to mark the muzzle.
Place the black patch on the face where one eye will be marked, and stick on a little black nose.
Use the scallop tool to mark the closed eyes (the black eye too - you just can't see that in the photo).


Attach the head to the body - use a little glue.


Add a tail and some other details...


I used the stitching tool to make it look more like a toy puppy.


Allow to dry.


Let sleeping dogs lie ; )


xxM

Monday, 16 September 2013

Lime and Coconut Cupcakes


Have I told you before that can be I can be a little one track minded obsessive compulsive??
 So in the past week I've made three different kinds of cupcakes with coconut cream. I'm not too sure what started it - this pursuit of a great coconut-containing cupcake.  (Maybe the upcoming Tropical Island Cupcakes theme??  That's a rhetorical question -  don't try answer it. I can't either. If I figure out the origins of this latest fixation, I'll let you know!)


But, anyway, it did lead me to try out this recipe - which I might not have done if the whole coconut-craze-thing wasn't happening.
And it's a keeper....


Lime and Coconut Cupcakes
Adapted from a recipe from Nikki Palmer

Ingredients
150g cake flour, sifted.
175g butter
120g caster sugar
2 eggs
75g shredded coconut
1 tsp baking powder
120ml coconut cream.

Preheat the oven to 180'C
Line a 12 hole muffin tray with cupcake cases.

Cream together the butter and sugar.
Add the eggs one at a time. Scrape down the sides of the bowl between additions.
Mix well.
Stir in the coconut cream, then fold in the shredded coconut and flour.

Spoon into the prepared cupcake cases and bake for 20-25 minutes, until a skewer inserted comes out clean.

Remove from muffin tray and allow to cool before icing.


Lime Mascarpone Icing.
Recipe by Tea, Cake & Create

250g mascarpone
1/2 cup (125ml) whipping cream
1/3 cup sifted icing sugar
1 lime - zest and juice.
Green gel colour *
Coconut flakes

Chill the mixing bowl and whisk attachment in the freezer for 20 minutes.
Place all ingredients into the chilled bowl, and whip until stiff.
*Add a drop of electric green gel colour if desired.
Pipe onto cooked cupcakes.
Top with coconut flakes.


Hmmn... flavours of the islands ; )

Enjoy!


xxM

Friday, 13 September 2013

Spring Cookies and Royal Icing


It is Friday the 13th.
So far, so good. *Touch wood*. Not that I'm superstitious or anything!
We had a lovely "Bugs and Butterflies" Cookies class this morning, and the mischievous Spring weather didn't  play any tricks on us.


Actually, the number 13 always conjures up the phrase "a baker's dozen" in my one-baking-track-minded brain. And that's about the extent of the significance of 13 for me!

Anyway... It's been a while since I posted anything about cookie decorating and royal icing.
So I thought I'd go back to the basics. Apologies if you've heard this a baker's dozen times at my classes : )

Getting good results with royal icing is all about consistencies and various layering techniques. And practice and patience!
Once you've made a batch of icing (recipe here), you need to water it down, literally teaspoon by teaspoon (slowly - because you know what icing sugar is like with liquids: a drop or two too much, and you go from too thick to too thin faster than you can say drat-darn-it!) until you reach the desired thickness. I generally work with two consistencies - 15second icing and - to use a highly technical term - "peanut butter" thickness ; )

I use the 15s icing for both flooding and general outlining, and the thicker peanut-butter icing - let's call it medium-consistency icing for short : ) - for some detailed work, finer outlines and stenciling.
If I'm doing very fine detailed lacework, piping royal icing roses or ruffles, etc then I use a stiffer icing. But generally, I prefer using the medium-consistency icing because it doesn't peak or "break" as much.

I use tiny Ateco 00 or PME 1.5 nozzles for fine detail work.


So, here's an example - a simply decorated blossom biscuit.

1st step
Outline and flood the centre with 15s icing (and Ateco 01 or 02 tips).
Allow to dry partially (anything from 10 minutes to an hour, depending on the humidity)
This allows the icing to "set" a little, so that there will be a textural difference between the centre of the blossom and the surrounding icing.


2nd step
Outline and flood the petals with 15s icing


(It looks about as appealing as a rubbery fried egg at this stage, doesn't it?!)


Leave to dry partially -again, anything from 10minutes to 1 hr.

3rd step
Layer on a few details:

Outline petals


and use a contrasting colour to pipe small dots around the centre of the flower - see how these layers now add interest and 'life' to the cookie?
(Piped with small Ateco 00 nozzles and medium- consistency icing.)

Allow to dry completely - 24 hours - before serving or packaging.


For a few more tips on cookie decorating basics, see this post


Happy decorating!

xxM

Thursday, 5 September 2013

Choc-Mint Cupcakes


Warning: if you typed Lindt and chocolate cupcakes into a search engine an arrived at this place, these cupcakes don't actually contain any Lindt chocolate....well, maybe!

But I'm talking about Lindt anyway....
And it will be sort-of relevant, if you're open-minded and think laterally  ; )

Ok, so Lindt...
It is by far my favourite type of chocolate. There are probably other great chocolates out there, but I'm in much too much of a comfort zone to find out.
My only hesitation with Lindt is which flavour combination of their Intense range to choose: Blueberry.... Caramel.....Orange .... Mint. Oh, um...
Mint and blueberry are probably on a par as my favorites, though.
(And as far as Lindt Wasabi Intense goes.... What were they thinking??)

(Getting to my point)  - the combination of chocolate and mint is, in my opinion, a classic winner.
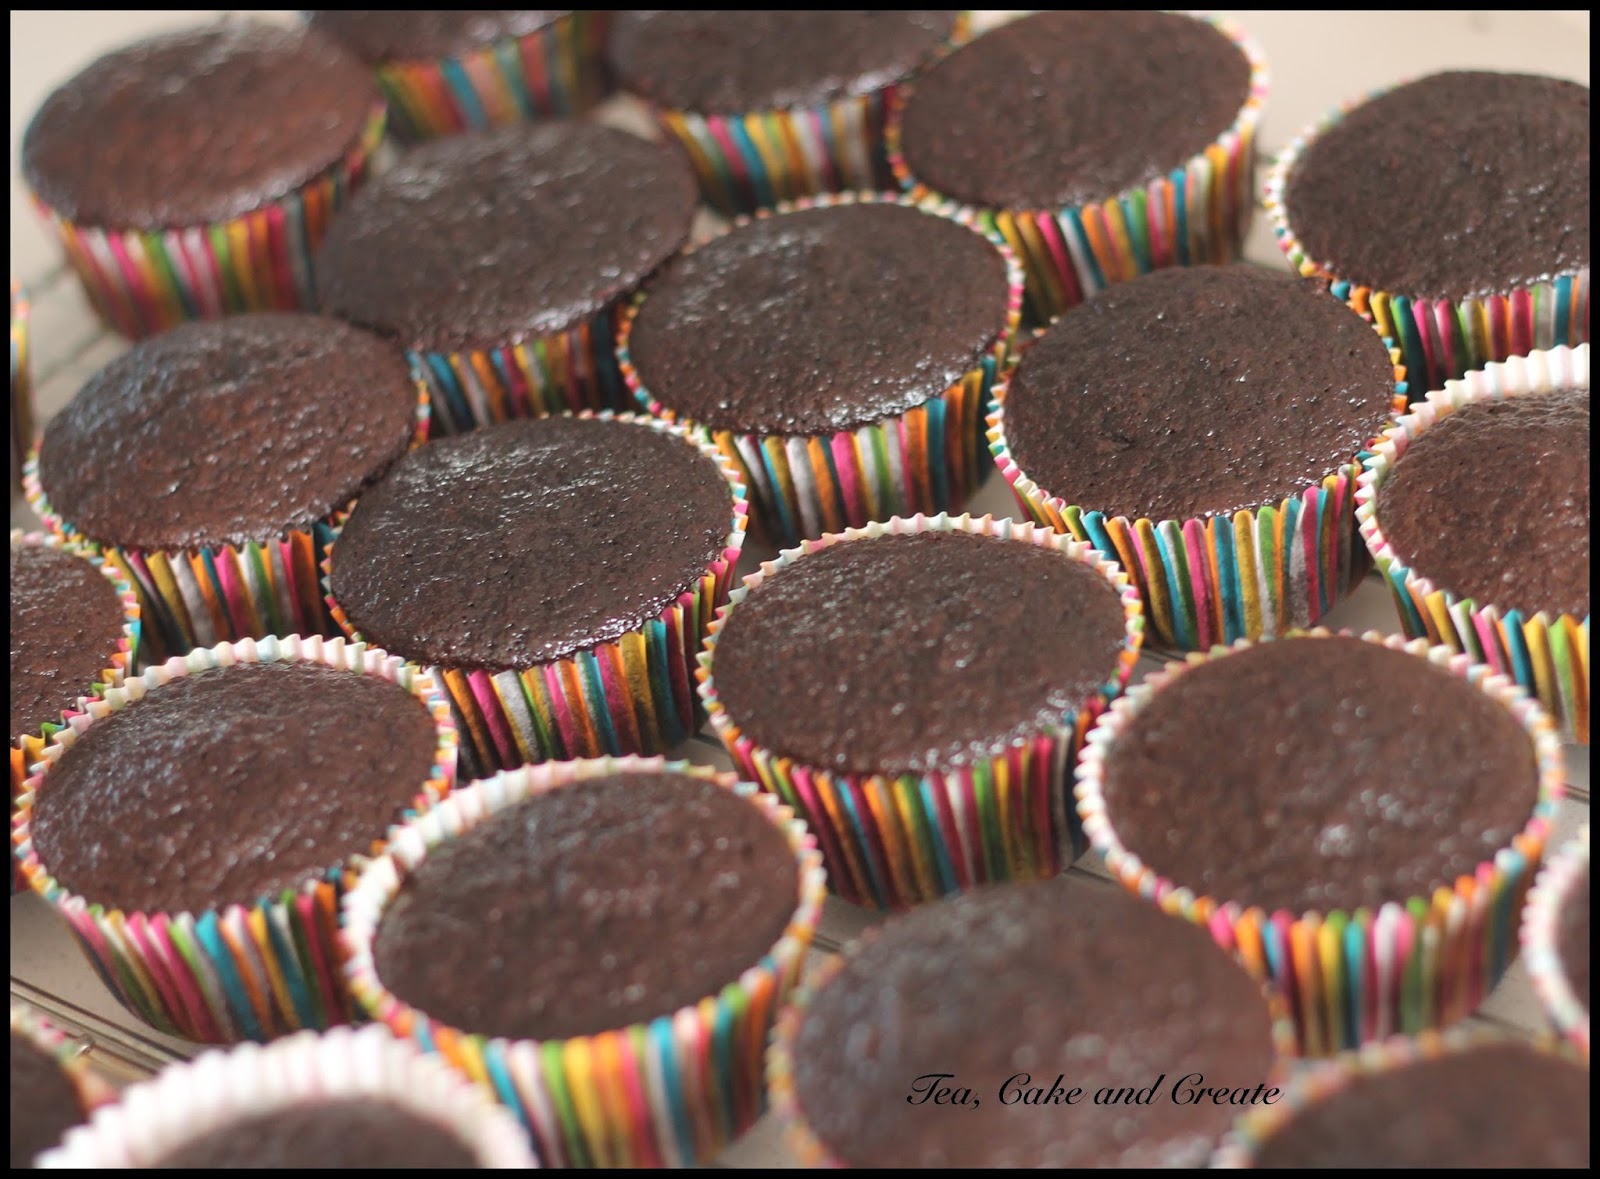
 and so here is a wannabe- cupcake version of it - an intense dark chocolate cupcake with a minty, rich chocolate icing.


Dark Chocolate Cupcakes
adapted from the Hershey's chocolate cake recipe.

Preheat the oven to 180'C
Prepare 2x 12hole muffin trays with cupcake cases. (Plus an extra 6 if you aren't using larger "American"-style muffin cases)

2 cups cake flour
2 cups sugar
3/4 cup unsweetened cocoa powder
1 1/2 tsp baking soda
1 1/2 tsp baking powder
1 tsp salt
1/2 cup vegetable oil
1 cup buttermilk
2 eggs, lightly beaten
1 cup boiling water **
1tsp Vanilla (8-10drops of Vanilla Girl vanilla extract)

** for an extra intense flavour, replace boiling water with a cup of strong, hot, black coffee

Sift together all the dry ingredients. Whisk to combine.
Make a well in the centre, and pour in the eggs, buttermilk, oil and vanilla.
Mix well.
Add the boiling water. Mix until combined.

Pour into the prepared cupcake cases - do not fill more than halfway!
Bake at 180'C for approx 20min, or until a skewer inserted comes out with a few moist crumbs clinging to it.
Remove cupcakes from muffin trays and cool.


Ice when completely cool.

Minty Chocolate Mousse Icing
Recipe by Tea, Cake & Create

(Enough for 2 dozen cupcakes)

150g butter, at room temp
1 1/2 tubs cream cheese (375g), cold from the fridge. NB use a dense cream cheese like the Woolworths brand or Lancewood.
1 1/2 cups sifted icing sugar
1/2 cup unsweetened cocoa powder, sifted
Mint essence.
1 Peppermint Crisp  - roughly chopped.


Use an electric mixer to beat the butter until pale and soft before adding the icing sugar.
Mix until just combined.
Add in the cream cheese and cocoa. Mix well.
Add a few drops of mint essence until you've achieved your desired mintiness.


Pipe onto cooled cupcakes and sprinkle with chopped Peppermint Crisp. (Alternatively add the chopped Peppermint Crisp to the icing before piping).

Garnish with a sprig of fresh mint.
But if you're thinking of replacing that with a square of Lindt chocolate - I like the way you're thinking : )

xxM

Sunday, 1 September 2013

Spring Cupcakes and Ateco Decorating Tips

It's Spring!!
Or rather it is officially Spring Day here in the Southern Hemisphere ; )


However - apologies in advance if I sound like a party-pooper - I'm not too sure that as a baker I should be celebrating the arrival of this season...

Spring means that my kitchen gets invaded by bugs. And I'm not talking about ones like these....


I'm talking about the kind that go on suicide missions into my syrup, and try to annex my sugar - one crystal at a time.

Spring means 6 weeks of drizzle and mist that turns fondant into goo.

Spring means humidity that makes royal icing a royal pain to work with.

Spring means melting meringue.

Spring means stress.

Have I ruined it for you? Sorry!!

But if I take the time to step out of my kitchen and look at the world, yes - spring is here, and it's pretty glorious : )


So, I'm going to celebrate with a bit of spring-cleaning.

It's time to get stuck into that decorating equipment drawer (ahem... room) and get it organized.

It's said that if you have something in your cupboard that you haven't worn in a year, throw it out. Now, you've probably got icing nozzles in your cupboard that you haven't used in a year (or ever??), but I'm not going to tell you throw to them out.
I'm going to suggest that you use them!
First, though, you need to figure out what they're for, right?! One way to do it is to make up a batch of icing, and just play around, experiment and see what you can create.
(That's why an adaptor/ coupler in your piping bag is so handy - you can swop nozzles without having a dozen different bags)
Standard Ateco Adaptors

Or you can refer to the manual : )

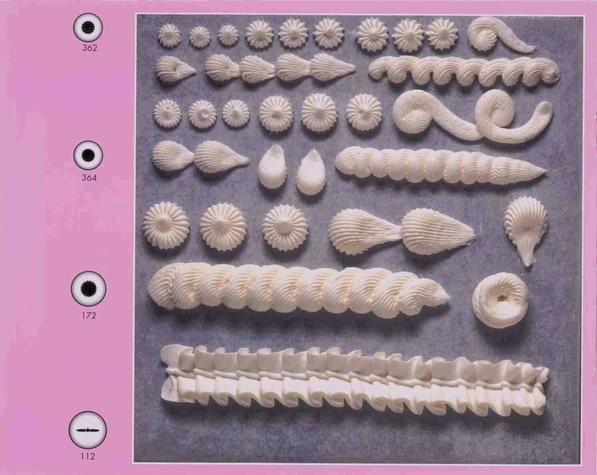
So here's a handy guide from Ateco of what their various nozzles/ decorating tips can do:


I hope that you find that helpful.

Clockwise from top - nozzles used were Ateco 104, 852, 80


Happy Spring (cleaning!)

: )

xxM