Tuesday, 27 March 2018

Easter Cookies - Little Lamb


I made a whole set of demo cookies for our Easter cookie classes using a completely different colour palette. Hated Felt dissatisfied with them; took to Instagram and got just the inspiration I needed from Genevieve, creator of Olly Polly Kids  and Motley

I really love the decor trend of simple monochrome colour schemes and minimalist looks. 
So, Gen's suggestion of yellow, pale pink, and mint was the springboard; add black and white, and I couldn't wait to get Easter-cookie-decorating... again!


It's different to what we've done before, but very much in keeping with my desire to keep things simple this year in the cookie classes. 
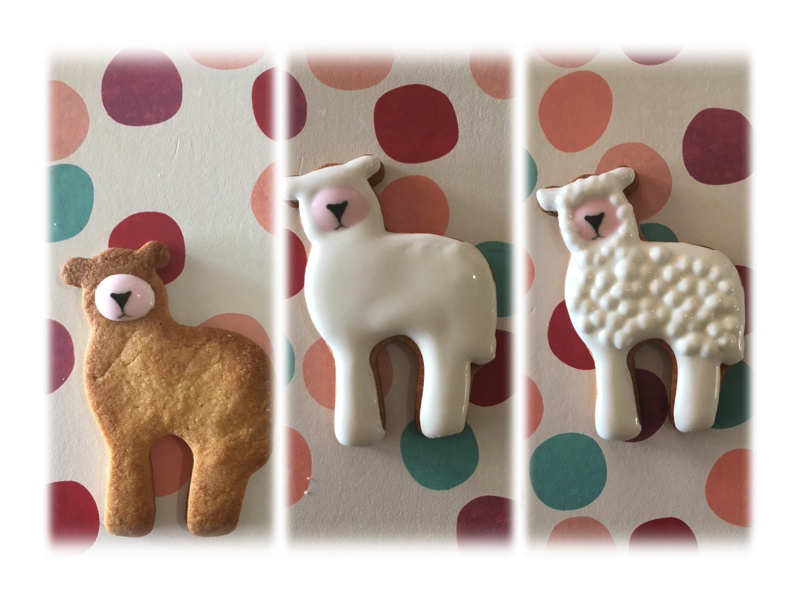
The colour scheme was conducive to lots of wet-on-wet patterns - including those sheep/clouds (inspired by ChuraCookie) and woolly little lamb. 


That effect is created by first piping on the face, letting that set; then flooding the body in white. 
 Before that icing dries completely, pipe on more flood-consistency white in little mounds - not too close together, because they will still want to merge, as flood-icing does. 
Once dry, it creates that lovely slightly puffy, woolly look. 
Here are a few more designs - 

Flowers; bunny cheeks and ears done wet-on-wet. 


My favourite pattern - some marbling with the black and mint:


 And "HOP"
... it's so much more forgiving writing on a cookie with thick wet-on-wet script if you have handwriting like mine!


Next post will feature the rejected cookies...

Happy decorating!

xxM 


Monday, 26 March 2018

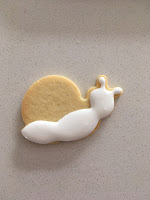
Marshmallow Snail Cookies

You may have seen these adorable snail cookies cropping up on Pinterest and Instagram.
They have the prettiest swirls of icing or meringue on their backs.
Who wouldn't want to live in a meringue shell, I ask you?!

Except in late summer in Durban - those meringues would melt before midday!


I decided to make the shells out of marshmallow, instead.
The first batch of marshmallows I made using this corn syrup-free recipe -  which is gorgeously soft and gooey.
But because these cookies were being packaged and sent off to school, I opted for a slightly sturdier result, and used the recipe below.

A candy thermometer is required, unfortunately - it's not a recipe where you can guesstimate temperatures.


Marshmallow Swirls
Recipe adapted from Ina Garten

Prepare 2-3 large cookie trays with parchment paper or silicon baking sheets liberally dusted with the icing sugar/ corn flour mix.

Ingredients:

20g powdered gelatin
300g caster sugar
120ml + 120ml cold water
250ml liquid glucose (or corn syrup)
1/4 tsp salt
1 tsp vanilla extract
Gel food colour
1/4 cup icing sugar + 1/4 cup corn flour - for dusting

Method:

In the bowl of a stand mixer, combine the gelatin with 120 ml cold water, and put aside.

Combine the sugar, liquid glucose, salt and remaining water in a small saucepan and stir over medium heat until the sugar has all dissolved.
Raise the heat to medium-high and allow to boil undisturbed until the syrup reaches 114'C / 240'F on a candy thermometer.

Carefully pour the sugar mixture into the gelatin and beat with the whisk attachment on low speed.
Slowly increase the mixer speed.
Add the food colouring and vanilla extract. 
Continue to beat on high speed until the mixture cools down and becomes thick and fluffy.

Spoon the marshmallow into a piping bag prepared with a large closed star tip (e.g. an Ateco 852).
(It's a sticky job, and you don't want to try refill the piping bag, so make sure you use a bag large enough to hold all the marshmallow to begin with!)

Pipe swirls of marshmallow onto the prepared cookie trays. 

Allow the marshmallow to set overnight. 
Dust the tops with remaining icing sugar/ cornflour mixture to cover any surface stickiness. 

The rest of the cookies are very simple - Outlne and flood the snail body; allow to dry. 


 Draw or paint on the face. 
Use a little edible pink powder for the cheeks.  


Attach the marshmallow "shell"  to the cookie with royal icing. 


Cute little critters aren't they?

I'm not sure who first thought of a swirl-for-a-shell, but I was inspired by the cookies of @pryanichnaya_lavka, a very talented Russian artist - look her up on Instagram.


Happy decorating!

xxM

Sunday, 18 March 2018

Ice-Cream Cone Birthday Cake

And then there was the cake.

It's been a really busy week, but I had Thursday put aside to make Sabrina's birthday cake.

Then I got called to help out in theatre Thursday morning. So, ok - I still had Thursday afternoon free (with the party Friday afternoon).
But of course morning work in theatre, evolved into afternoon work in theatre.

Well, I still had Friday morning...
And of course I was called out to a caesarean on Friday morning. 🙈


So, a little rushed - it could have done with some finessing - but here's the cake as it turned out.


The  cone part  is vanilla cream cheese pound cake, covered in a modelling chocolate / fondant blend. 
The scoops of ice-cream are large cupcakes (rich chocolate, and red velvet) roughly covered in buttercream to look like ice-cream. The swirl of cream is also buttercream icing. 


The design was inspired by ice-cream cone cakes made by Shawna McGreevy and Darcey Oliver. 
Despite it being such a rush, it was really fun to make. And my daughter loved it - which is all that counts!

Happy decorating!

xxM 

Saturday, 17 March 2018

Ice-Cream Cone Cookies

To say that I was a little stressed this week about Sabrina's party is an understatement. 
An ice-cream themed party with a pool slide in late summer seemed like a great idea, but the one element that I couldn't control was the weather. 
Despite checking the forecasts  six times daily  regularly these past few days, not believing that the temperatures would actually shift downwards so rapidly on the day of the party, they did. 
Party day arrived misty and damp. 
Great ice-cream weather 🙈 

One thing I was on top of though, were the party-treats. Most of it was sorted with the hiring of a soft-serve machine, and purchase of lots of sprinkles and toppings. 

The rest I kept very simple, including these cookies:


Limited colour palette, outlining and flooding with the same consistency, 


and just a little airbrushing and use of royal-icing crumble to add dimension. 


I don't have a double scoop cutter, so used an ice-cream sundae cutter instead, and trimmed it a little. 


The crumble is made using a tutorial by Clough'D 9 Cookies:


It's a thin layer of royal icing spread onto parchment with a palette knife, left to dry, then crumbled up. 

So clever, isn't it? 


So, that was the cookies sorted.

I'll tell you about the cake next time.

Until then, happy decorating!

xxM

Sunday, 4 March 2018

Fluffy Raspberry Crumpets

Sunday crumpets.
The words evoke images of lazy days with cups of hot tea; feet up, reading on the couch.
Bliss!


Just like Sunday in our house  isn't...

They might once have been lazy and carefree days, but I just can't remember.
(It's like when you repress traumatic memories, but the opposite... 🙈 )

What did we do with our weekends before having to spend them entertaining kids; feeding kids; tidying up after kids...?!

Anyway, the kids wanted crumpets, so we made these:


Fluffy Raspberry Crumpets. 

320g cake flour
100g caster sugar
1 tbs (3tsp) baking powder
A pinch of salt
3 eggs lightly beaten
250ml milk
1 tsp vanilla extract
30g butter, melted
100g chopped frozen raspberries

Sift the dry ingredients into a bowl.
Make a well in the centre, and pour in the milk, vanilla, eggs and butter.
Mix until just combined. Fold in the raspberries.

Heat a little oil in a large frying pan and place scoopfuls of the batter into the pan.
Cook on medium heat for a couple of minutes before flipping over; the crumpets should be a light golden brown colour.

Serve warm with butter and jam; or drizzle with syrup or honey.


That'll keep them entertained and fed for a while.
Now make yourself a cup of tea. And put your feet up.


Enjoy!

xxM


Tuesday, 13 February 2018

Valentines Puppy Plaque

There's only one day left until the 14th Feb! Have you got anything special planned? Or are you just going to pretend it's not happening? 😉


Now, I know I say this every year ... Valentines isn't something we celebrate. 
B-u-u-ut celebrate does not equal decorate
So, there have been Valentines-themed edibles exiting my kitchen for the past couple of weeks already.     


Last year we did "Puppy Love" for the Valentines cookie class. That was one of my favourite V-Day themes to date. (It has now been eclipsed by this year's "Stuck on You" theme).

I so enjoyed that theme and those colours, that when I saw a clay plaque similar to this, I knew I had to re-create if in fondant.
(Or rather fondant and modelling chocolate - my standard blend).
It's so very quick and easy to do, that if you're only deciding now to make a cake for your special people for tomorrow, a decoration like this will take hardly any time to put together.


I used a little rubber stamp set to print on the "i / you".
If you don't have letter stamps, you could paint it on, or write it on using an edible marker.


Place onto the top or side* of a cake, or make a smaller version to use as a cupcake topper.

(*For heavy details going onto the side of a cake that's been covered in fondant, I use melted chocolate to secure it in place.)

Happy Valentines Day and happy decorating!

xxM

Monday, 5 February 2018

"Stuck on You" Valentines Cactus Cookies

The very first class I offered was Valentines Cookies.
Those days I had mounds of enthusiasm and not much skill, or experience.
We used three colours (red, white and pink), and decorated heart-shaped cookies. Heart-shaped cookies only.
Visionary stuff! 🙈

We've progressed a little since then.
And become a little more imaginative with the theme!

This year it's "Stuck on You"  - cacti being so on-trend. And oh-so-huggable!


I love all the various wet-on-wet techniques one can play with in this theme:

Like this one, with just a bit of feathering on wet-on-wet stripes


and this one, even simpler - just stripes.


That's the easy part.
The tricky bit, and always my biggest challenge, is writing script on a cookie. And it's a must for this particular theme.


If you don't have a projector to make your life easier, then print out the fonts that you'll be using and use a transfer method to get the script onto a dried flooded background.
Here's one way: http://www.sugaredproductions.com/blog/transferring-an-image-without-a-projector/
and here:
http://www.sweetambs.com/tutorial/piping-without-a-kopykake-projector/

 Or throw caution to the wind and copy them free-hand  (which is still a step up from just winging it!). I write the script on lightly with a graphite pencil first, then go over that with icing.


 If you're looking for a great selection of fonts, try www.dafont.com,  or download an app like Font Gallery on your tablet or phone.


There you go... Looking sharp!

😉
xxM