Pages

Thursday, 26 March 2015

Cream Cheese Pound Cake

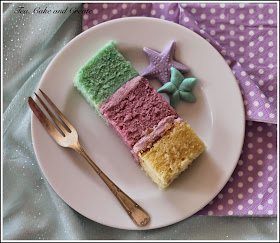
Yeah, you've seen these mermaid cake pictures before... But I'm using them to prettify this page because I've only got 1 picture of the inside of the cake (which is what this post is about).
It was so hot on the day of the party, that the cake literally melted.
Ganache and modelling chocolate are great; just not outside in 38'C heat.


I'm incredibly thankful that the day I covered the cake was slightly cooler, stressed as I was about getting it done in time - squeezed into a couple of  hours between caesarian sections in the morning, and again in the afternoon. (Stop having babies, dammit - I'm trying to decorate cakes here!)

I used a cream cheese vanilla pound cake recipe for the cake; baked in three  7 inch pans (I wanted a tall cake) and coloured using gel colours. The fill between layers is marshmallow cream. 


Cream Cheese Pound Cake 
Recipe adapted from Taste of Home 

Preheat the oven to 180'C
Grease and line 3x  8inch round cake pans (or 7 inch pans).
You can also use a Bundt pan, but baking time will be considerably longer.

 Ingredients


250g butter
500g caster sugar
250g cream cheese
6 large eggs
125ml vegetable oil
450g cake flour
1 1/2 tsp baking powder
2 tsp vanilla extract
1/4 tsp salt


In the bowl of your electric mixer, cream the butter and sugar together until light and fluffy.
Beat in the cream cheese.
Add then eggs, 1 at a time; beating well. Scrape down the bowl between additions if necessary.
Beat in the oil and vanilla.
Sift in the dry ingredients, and mix until just incorporated.

Pour equal amounts of the batter into the prepared cake pans, and bake for approx. 30 minutes, or until a cake tester comes out clean.

Remove from the oven, and allow to cool in the pans before turning out onto a cooling rack.


If you want to colour the layers - weigh the batter; divide it into three bowls, then use gel colours in each portion.
I used sky blue (which becomes aqua because of the slightly yellow base colour of the batter) and a mix of regal purple and electric purple for the purple layer.


Happy baking!

xxM

Sunday, 22 March 2015

Mermaid Birthday Party

Months ago when I was setting up my schedule for the first semester, I set aside this whole week to leisurely prepare for my daughter's mermaid-themed 5th birthday party.
As it turned out, I spent the whole of Monday morning on an outing with my son's class; Tuesday morning in theatre; Wednesday, the whole day on a course; Thursday and Friday back in theatre...(Oh, and did I mention my husband was away over the weekend for a conference?!)
So, by the time the party arrived, I was feeling ragged. But my sister came to the rescue and helped set everything up, and I think we managed to pull it off...
I say think because it was just a blur of activity (in ganache-melting 36'C heat!)
Here are some pic's before everything (including the guests!) melted....

Paper pompoms

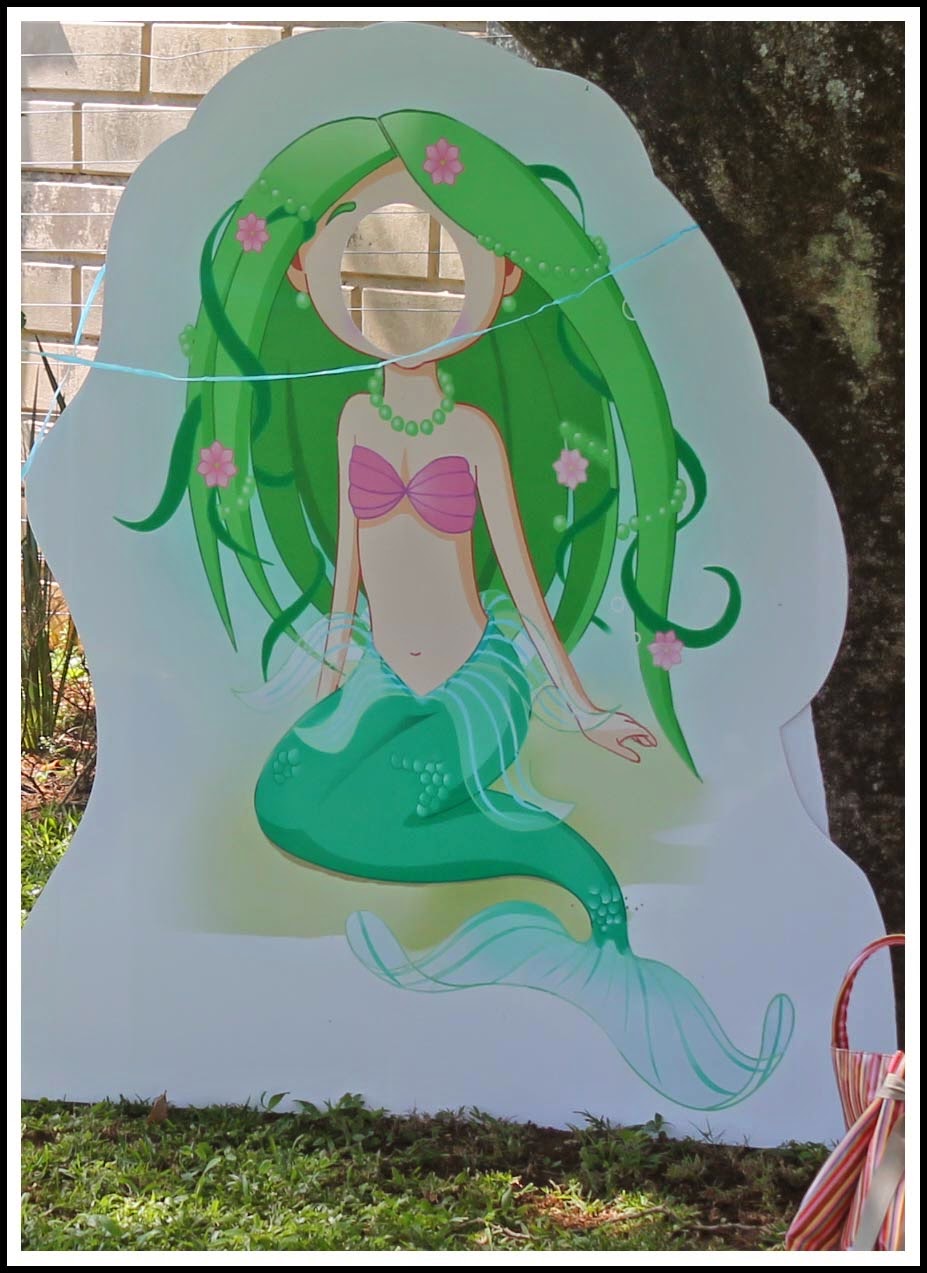
 Mermaid photo prop (thanks to brett@acresofpixels.co.za) 


 The purple and aqua tutu that I made ... and that the party-girl refused to wear...


Children's treats table

Mermaid Cake

Sea-themed cake pops

...cupcakes

Shell and starfish cookies


Underwater details

 
...and the modelling chocolate mermaid cake topper, who succumbed to the heat like the rest of us!


I'll share the cake recipe I used on my next post.


Have a great week!

xxM

Tuesday, 17 March 2015

Oreo Bites


They say that necessity is the mother of invention.
I don't know who they are, but they're right.
I needed butter to bake something for tea for the next day's class. I didn't have butter. (How could I not have butter!?!) But I did have ganache. Go figure!
So, I "invented" these.
Who knows if they're original.
They say there's nothing new under the sun. (I think they're wrong on that one.)

 But here they are - a tea treat that doesn't need butter...
I'm calling them Oreo Bites.
 Or Oreo Bombs. Maybe Oreo Pops.
 Um... Oreo Thingy's - that one was Tammy's title; giving credit where it's due  ;o)


Oreo Bites / Bombs/ Pops
Recipe by Tea,Cake and Create

300g Oreo biscuits, finely crushed
200g white chocolate ganache
200g dark chocolate, melted - for dipping.
Cocoa for dusting


White Chocolate Ganache

150g white chocolate
50g cream (35-40% fat content)

Melt both ingredients together in a double boiler.

Allow to cool slightly.

(If you're using ganache that has already set, heat it gently - either in the microwave or double boiler - until it is at spreading consistency.)


Assembling the Oreo Pops:
Mix the crumbs and ganache together.
Take spoonfuls of the mixture and roll into balls.
Refrigerate for 30minutes

Dip in melted chocolate. (I do this by dipping half, allowing it to set; then dipping the other half).

Dust with cocoa powder. Serve. Eat.

xxM


Friday, 13 March 2015

Spotlight - Blossoms and Bakes, Hillcrest

For a while now I've been mulling over how best to promote and bring to peoples' attention the talented ladies I've encountered through my classes. I wanted it to be more substantial than just sharing their pages on Facebook.  And I personally love to know about people. (It's called being interested,  not nosiness, ok?!)

So, herewith the first of what I hope is going to be a monthly feature of interviews with local bakers, decorators and associated business owners.

Let's all say Hi to....

 Blossoms and Bakes, Fancis Bothwell


Tell us a little about yourself / your background.


My name is Francis Bothwell.  I grew up in the Netherlands and after finishing fashion school where I had a great outlet to be creative and learn about photography, styling and graphic design, I travelled the world.
I have since settled in Hillcrest South Africa with my husband* and our 5 year old son.
(*Editor's note - Fran's husband helps me out whenever I've got my self in too deep with my Mac. He's an Apple expert... Mac Access)


How did you get into baking / decorating?


 I always loved baking, as a young girl I loved to bake with my Mom.
But missing home and craving Dutch treats I started baking biscuits and cakes for myself, family and friends.They where such a hit that I kept getting orders and when I saw some iced biscuits in a local deli I knew this is what I wanted to do.

What do you like making / decorating the most and why? 
Anything you steer clear of? 
 I don’t really have a favourite as I prefer challenging myself and trying out new recipes.
 I don’t really steer clear from anything. And if it’s believed a recipe is hard, it makes me 
 want to try it even more.

What are your biggest baking / decorating challenges?  
Have you had any memorable disasters? 
 It is really important to me to use natural and good quality ingredients. As I use only 
 natural colouring it can be very challenging to get the right colours for icing and fondant.
 I remember trying to make black icing and started off with way to much icing to colour black 
 and ended with a huge bag of grey icing!
      

What's are you most proud of so far? 
 It is not necessarily a product but the fact that I have not given up yet and still challenging
 myself to try new things.


What would you say your style is, or is there a particular style you like to follow? 
 I would say my style is organic and simple, drawn to more natural colours and materials.
 Donna Hay for example, her style I enjoy.

Where would you like to go with your craft? 
My short term goal at the moment is to learn as much as I can and develop my personal style.
Long term it would be fantastic to be able to bake and style for magazines and maybe even start my own blog.
   
Any words for the decorating community? 
Don’t be discouraged if a recipe doesn’t work out. Don’t give up, research and keep trying, and don’t loose sight of what inspired you to bake, have fun with it!


..................................
---------------


Aren't Fran's photo's great?! It was seeing her pictures on her FB page, that really spurred me into action to get these interviews started.
So, go over, see for yourself and show her some love at Blossoms and Bakes.

Until next time...

xxM

Tuesday, 10 March 2015

Baby Shower Cookies : Baby Shoe

Most of the time my cookie classes' themes are inspired by what's happening: seasons, celebrations, styles. But I'm relieved to say that this class wasn't one of them. I'm very glad for you if you're  pregnant; but I'm more glad for me that I'm not...!
My son says he wants a brother, and my daughter wants "a gazillion" sisters. I say no NO! You two are just perfect. You two are ENOUGH!


SO,  ahem... I mean so...


How to decorate a Baby Shoe Cookie: 

Outline cookie with piping consistency royal icing, and allow to dry

 Flood with "15 second" baby blue icing.


Pipe on wet-on-wet dots with 15 second white icing, and allow to dry.


 Pipe on stitching with piping consistency icing; and the start of a small button with 15 second yellow icing. Leave to dry.

Pipe a border around the circle of yellow icing to create the button with 15 second icing; and pipe on  the criss-cross stitch.
 Leave to dry.


Royal icing recipe and explanation of consistencies here
Gorgeous baby themed cutters from Treat Boutique


Happy decorating!

xxM 

Wednesday, 4 March 2015

Sour Cream Vanilla Cake

I have a go-to chocolate cake recipe; I have a vanilla cupcake recipe that I use whenever I want a simple sponge cake, but I'm still on the hunt for the perfect dense, moist pound-like-but-not-too-heavy vanilla cake. It must be uncomplicated; I don't want to have to separate eggs; and it needs to be big enough to create three 8 inch layers...
 What, me - fussy? No!
 Do you have one you'd like to share with me?!

This cake comes close in terms of texture and taste, but the volume is a little small for my last requirement. I like tall cakes; I'm sorry but I just do...

So I may fiddle with the volumes a little more, or I may just move on to another recipe. But this one is definitely worth sharing: it makes a great tea cake, and cupcakes too.


Sour Cream Vanilla Cake
Recipe adapted from MyCakeSchool

Preheat the oven to 180'C
Grease and line 2 x 8inch round cake pans*

Ingredients:

300g cake flour
300g caster sugar
1 1/2 tsp baking powder
1/2 tsp salt
200g butter, softened (but not microwaved!), cut into cubes
4 eggs
325ml sour cream
2 tsp vanilla extract

Sift the dry ingredients together into the bowl of your mixer.
Mix on slow speed for a few seconds to fully incorporate the baking powder.

In a separate bowl, whisk together the eggs, sour cream and vanilla.

With the mixer on low-medium speed, add the cubes of butter, a few at a time. The mixture should begin to resemble breadcrumbs.

Add the egg/ sour cream mixture to the flour/ butter mixture. Add half, beat for a few seconds; scrape down the sides of the bowl, then add the remainder. Beat on low speed for approx. 1 minute until the batter is smooth.

Pour into the prepared cake pans.

Bake for 30-35minutes until a cake tester comes out clean.
*(I use 3 pans because I like 3 layer cakes. The baking time is then about 20-25min).

Allow to cool in the cake pans before turning out onto a cooling rack.

Use your favourite icing or filling between layers ( jam, lemon curd, caramel, butterscotch...)
Dust with icing sugar and serve.


Happy baking!

xxM

PS. Don't forget to send me your  favourite vanilla cake recipes ;o)

Sunday, 1 March 2015

Hand Painted Cookie

Every now and then I actually get a minute or ten to try out something I've been wanting to do for a while.
This was one of them - hand painting on a cookie.
I'll be the first to admit that I have no painting skills, but it's not too hard to streak some splodges of colour on a cookie. I'm sure my 4 year old could do it... and would have if I'd been willing to share my cookies with her!

I didn't take any step by step photos (again!) because I didn't know how it would turn out.
But basically -

  •  create your white canvas by flooding a cookie with royal icing
  • allow that to dry overnight
  • make edible paints out of a 1:1 mix of gel colour and clear alcohol
  • paint on the first colour with a flat tipped brush (size 3) 
  • allow to dry
  • paint on subsequent colours, allowing drying time in between
  • once the paint layers are dry, draw on your chosen image with an edible marker. 


Happy creating! 

xxM