Pages

Sunday, 30 November 2014

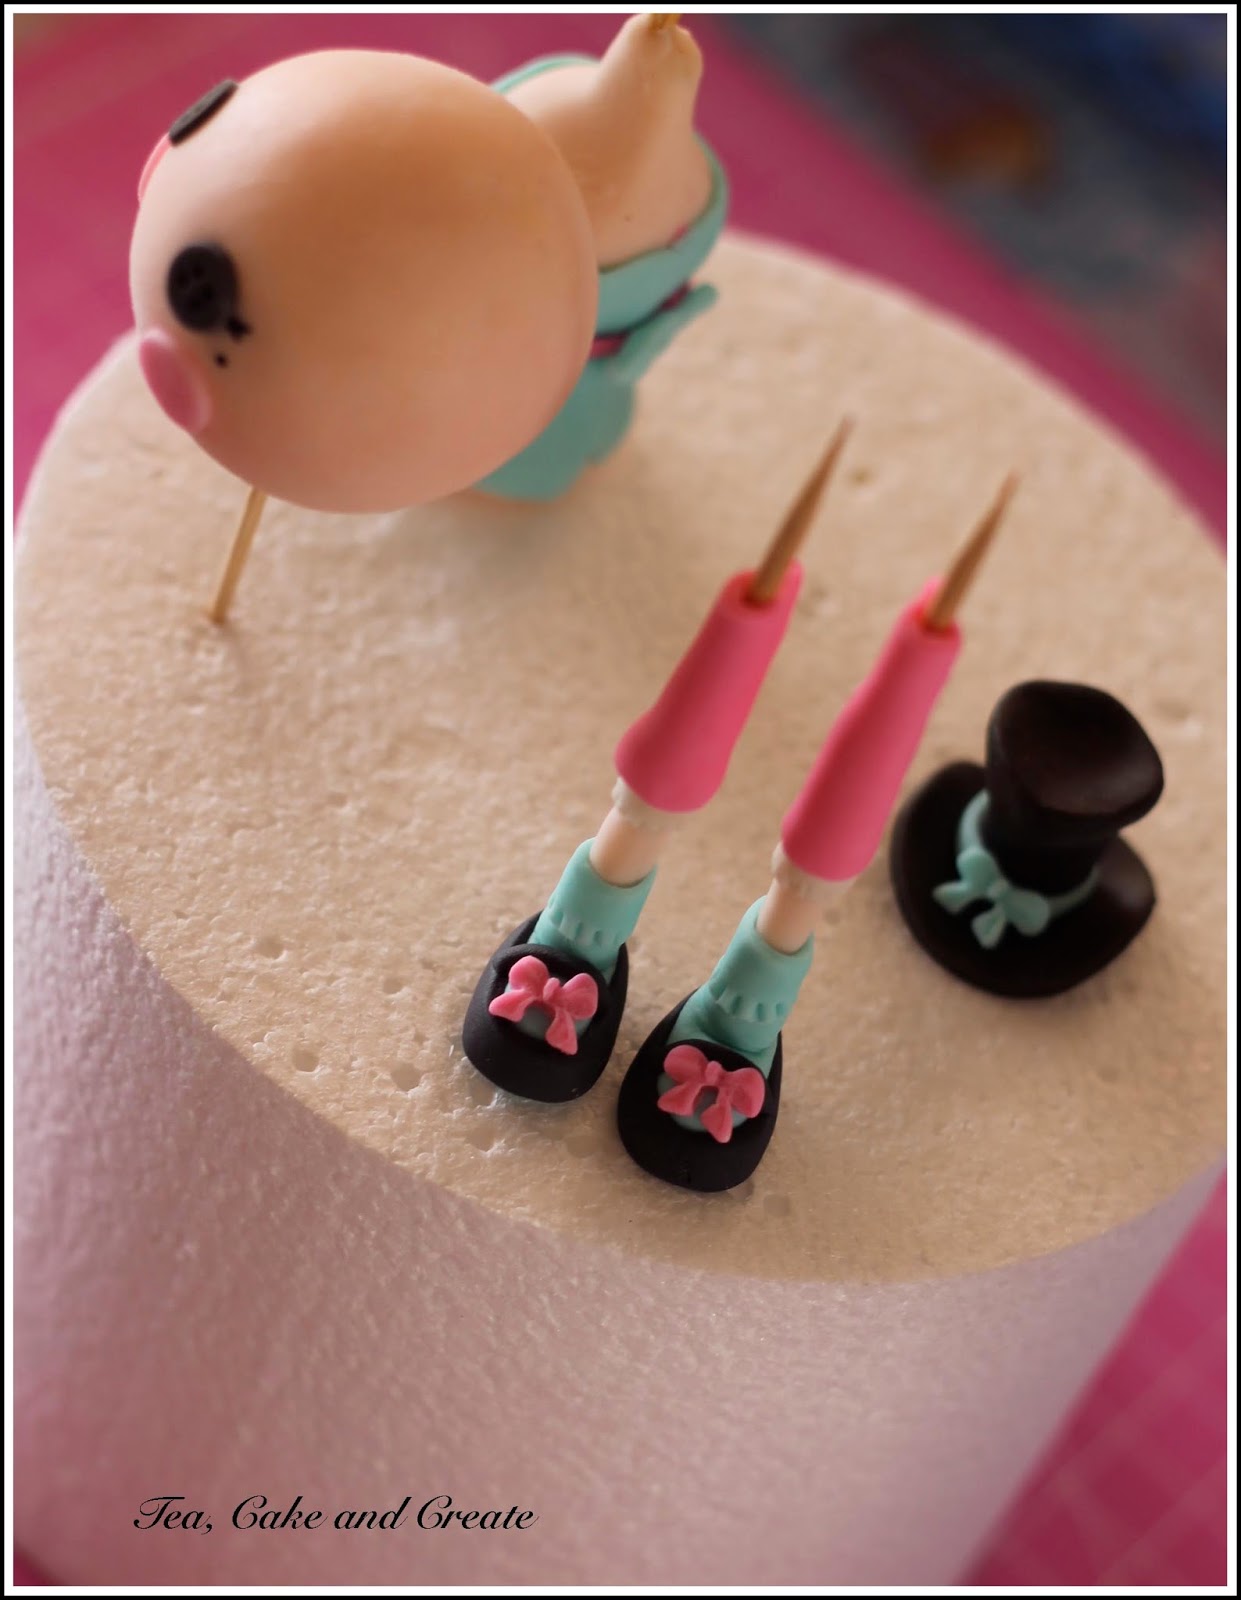
Fondant Ballerina Cake Topper

I hope that I'll get to do a ballerina-themed party for my daughter sometime, but we've discussed her parties until she's 8 (she's 4 now) and apparently it's not on the agenda for the near future!
But that doesn't stop me from collecting inspiration just in case - like this photo frame I took a phone-pic of a few months ago.


When I saw it, my first thought was not  "That would look sweet in Sabrina's room." (although it would!). Uh-uh. What I thought was "What an adorable figure that would be to sculpt!" Cake brain! 

Anyway,  I finally got the opportunity to make her this week. (Thank goodness there are other little girls out there who want ballerina parties!) 


I'm a little rusty with my figure-modeling, because I've done so little of it this year. 
And like anything in sugar craft, getting it right takes a lot of practice.

It also helps to have some idea of where to start. 
There are dozens of videos on YouTube. Some good, some... um... not so good. 
And after you've watch a few, you'll see that that there are a number of different approaches, and everyone seems to have their favourite tools. But they give you some ideas, and you'll probably soon develop your own style and techniques as you go. 

Here are some videos on fondant face sculpting: 
https://www.youtube.com/watch?v=wPDkAfhN2k0
https://www.youtube.com/watch?v=gFJuP25RRX4
https://www.youtube.com/watch?v=tS3PmrG1eWA


Sunday night viewing ;o)

Have a sweet week!

xxM


Tuesday, 25 November 2014

"Light" Gingerbread Cookie Dough Recipe

This is what happens when you've made the same batch of cookie dough over a hundred times in one year: you automatically start making it for the next batch of cookies, then realise fiddlesticks, it's for Christmas cookies - they're supposed to be gingerbread.
So, you take the same-old-same-old (which was still at the butter and sugar stage, thankfully) and hastily add some ginger, mixed spice and golden syrup, (and commit to using brown sugar for the next batch) and voila ... "Light" gingerbread cookie dough.


I've made another 12 batches of it since then, so now it's official...
;o)

Light Gingerbread Cookie Recipe 
Recipe by Tea, Cake and Create

250g butter, at room temp. 
300g light brown sugar 
1-2 tsp ground ginger (depending on how "light" gingery you like it!)
1 tsp mixed spice
2 tbs golden syrup
2 XL eggs 
620g flour
1/2 tsp salt
1 tsp vanilla extract 

Cream together the butter, sugar, spices and golden syrup. 
Add the eggs, one at a time, beating on low speed. Scrape down the sides of the bowl. 
 Add the vanilla. 
Sift in the flour and salt. Mix until just clumping, then form into a ball by hand. Place in cling-wrap, and refrigerate for 4 hours or overnight. 

Roll-out and cut out cookies on a surface dusted with cornflour. (See here for some tips).

Bake at 180'C for 8-10 minutes until the edges are just starting to turn golden. 

Decorate when completely cool. 


And yes, you can start baking your Christmas cookies now - they freeze well. 
If it's humid when you're thawing them, just pop them into a warm oven with the fan on to dry them out a bit. 

Happy baking!

xxM 

Wednesday, 19 November 2014

Flour-less (Gluten-free) Chocolate Torte

This is a very simple, single layer, easy to make torte (no separating of eggs, or folding in meringue) that I put together for a lunch party we were having with friends who need to avoid gluten.

 The almond flour gives it a dense, fudgy texture, which is beautifully complemented by the light  whipped cream and fresh strawberries topping.

But warning! Gluten free does not = carbohydrate free. (Sadly!)
Apologies to all the Banting and Paleo followers: thus cake contains S-U-G-A-R!
(Could it be made with Xylitol? P-R-O-B-A-B-L-Y.... But I'm no xylitol expert. So if you do try that out, let me know in the comments below!)
I'm sure it is relatively low GI, though. So if that's the eating plan that you follow (and for the rest of us that just wing it!) ... Guilt-free desert ahead  ;o)


Flour-less Chocolate Torte with Strawberries and Cream
Recipe by Tea, Cake and Create

Preheat the oven to 180'C
Grease and line a 20cm cake pan.

Ingredients:
100g butter
200g caster sugar
2 eggs
120g melted dark chocolate
200g almond flour
50g cocoa powder
1 tsp vanilla extract


Cream together the sugar and butter.
Add the eggs, 1 at a time. Beat well between additions. Scrape the mixing bowl down, if necessary.

Pour in the melted chocolate.  Add the vanilla. Mix well.

Sift in the almond flour and cocoa powder. Beat briefly on low speed.

Pour into the prepared cake pan.
Bake for approx 45 min, or until a cake tester comes out with a few moist crumbs attached.

Cool in the cake pan before turning out onto a cooling rack.

Top with whipped cream and fresh strawberries and a dusting of icing sugar.


Whipped Cream

250 ml whipping cream
2 TBS sifted icing sugar 

Place both ingredients into a mixing bowl that has been chilled in the freezer for 15 minutes. 
Whip on high speed until stiff.  


Enjoy!

xxM 

Saturday, 15 November 2014

Lalaloopsy Doll


This post should be  subtitled - "An Ode to Vodka".
No, it's not what you're thinking! I actually don't drink the stuff. And by saying "the stuff" you might think I sound a little judgmental of those that do. No, not at all (unless of course you're walking around swigging it from the bottle in a brown paper bag and you haven't washed your hair in two weeks and the cat has moved next door to be fed.... Then I might be just a teeny bit judgmental....sorry!)
What I'm talking about is it's miraculous powers to clear up little mishaps....


This is how I make a Lalaloopsy: I start with the head. Put on the eyes. (A little fiddly, those button eyes!) Then the cheeks. Then I leave it for oh, a decade or so. Because I'm so convinced that I'm going to mess it up when it comes to painting on the mouth.
And I did mess it up this time. But that's when the bottle of vodka gets pulled out.
Soak a little cotton wool in vodka and erase the damage. That's it. Very un-dramatic, but that's the point: no drama! No tears, no throwing a tantrum (or a Lalaloopsy head across the room). Just a little vodka on some cotton wool - replace with clean cotton wool once it's soaked up some of the paint. Ta-daaa!


Happy decorating!

xxM

Tuesday, 11 November 2014

Character Cupcakes - Dusty the Plane

Well, it wasn't the first time this year that I sat down to decorate the demo cupcakes for a class and thought what was I thinking?! This time, though, it wasn't because I needed inspiration, but because there were just too many choices.
Where to start, but more tricky - where to stop with Character Cupcakes?!


I had in mind doing only the characters that could be covered by a predominantly red, black and white colour scheme. And maybe some yellow. Well, a lot of yellow and some blue. Um, perhaps a bit more blue that that...


And then, I put it out there and said that the class attendees should suggest any that they'd like to do...


So, it was quite a collection of characters in the end. But I thoroughly enjoyed making them!


Anyway, here are a few tips on making Dusty, the plane cupcake:


He is a pretty simple construction of a few basic shapes and strips of fondant.
(All paste used is a mixture of coloured fondant and modelling chocolate).


After creating a buttercream dome on the cupcake, cover with white fondant. Use a dresden tool and flatten out symmetrical areas on the sides of the cupcake in anticipation of placing the wings.


Make the wings first, as they need time to harden.
Start with a square of paste; cut it into 2 at a slight angle.
 Flip one of the pieces over so that they are a mirror image of each other.
Stick on the orange strips.
Paint on the 7. The circle is stamped on with a small circle cutter dipped into the edible paint (black gel colour mixed with clear alcohol).

Allow to dry before attaching to the cupcake.


For the propeller - cut out a circle of paste.
Impress a smaller circle into the centre to act as a guide - to limit your cuts.

Cut out the wedges.

Then allow to dry.

Stick onto the front of the cupcake, and place another button of paste onto the centre.


 Shape the cockpit by hand.
Tap it on your work surface to flatten the sides.

Use a small palette knife to demarcate the windscreen.


Construct a tail out of a small rectangle and a wedge of paste.


Add the central strip of orange and blue paste and start putting it all together.


The eyes are small squares, cut at a slight angle on the top, layered with a small blue circle and black pupil.


You may need to add support underneath the wings - dry spaghetti or toothpicks.
If you use toothpicks, they must be removed before the cupcakes are served.


Happy decorating!

xxM


Saturday, 1 November 2014

Walnut and Pumpkin Cupcakes with Cinnamon Brown Sugar Mascarpone

  I meant to post this yesterday as a gourdish (rather than ghoulish) halloween offering. My plan was to write it up while the kids were out trick-or-treating with my husband. But he got called to theatre, and so I huffed and puffed, donned my scary outfit* and went out prowling the neighbourhood.
I landed up fretfully dragging my 4-year old around while I tried to keep up with my 6-year old and the older children. I didn't want to loose track of a black-clad child in the descending darkness. Frightful!

*a poncho raincoat. But by the end of it, thanks to the persistent drizzle, bedraggled hair and smeared mascara, no-one would have guessed that it wasn't a genuine dress-up costume ; )

Walnut and Pumpkin Cupcakes with Brown Sugar and Cinnamon Mascarpone Icing


Walnut and Pumpkin Cupcakes
Recipe by Tea, Cake and Create

Preheat the oven to 180'C
Line 2 x12-hole muffin trays with cupcake cases.

500ml (2cups) pumpkin purée**
275g brown sugar
1 cup vegetable oil
4 large eggs
375g flour
2 tsp baking powder
1 1/2 tsp baking soda
1 tsp ground cinnamon
1 tsp mixed spice
1/2 tsp salt
100g roasted walnuts, roughly chopped.

**roast the pumpkin with a little butter and brown sugar; puree once cooked. 


In the bowl of an electric mixer, beat together the oil, sugar and pumpkin purée
Add the eggs 1 at a time, beating well between additions.

Sift the dry ingredients together, and add to the pumpkin mixture.
 Mix until just incorporated.
Fold in the chopped roasted walnuts.

Spoon the batter into the prepared cupcake cases and bake at 180'C for approx 20min, or until a cake-tester comes out clean.

Remove from the cupcake trays to cool.


Brown Sugar and Cinnamon Mascarpone Icing

250g mascarpone
250ml (1 cup) whipping cream
100g (1/2 cup) brown sugar
1 tsp ground cinnamon

Chill the mixing bowl and whipping attachment for 30 minutes before proceeding.

Place all the ingredients into the chilled mixing bowl and beat until a stiff, piping consistency is reached.


 Pipe onto the cooled cupcakes.


Happy...um...November!

xxM