Pages

Tuesday, 31 December 2013

Shooting Stars and Streamers

And here we are, counting down the last hours of 2013.  What a year it has been! Good or bad - I won't say; but crazy-busy definitely! I feel like I was slow getting off the starting block, and never quite caught up, or caught my breath. I doubt that 2014 is going to be any calmer, though - I'll just have to get faster!

I was planning on doing a year-in-review post, but I've never enjoyed those flash-back kind of episodes in sitcoms (where you can tell that they've run out of momentum and are now just re-viewing the best jokes of the season), so I let that idea fizzle out.  And, um - well... I also ran out of time.

I made a cake instead:


(that's not just a random party-pig there, it's a Glucksswein ...

Glücksschwein(chen)  

 Glücks•schwein•(chen)      nt   pig as a symbol of good luck ) 

: )


… and I put together a quick tutorial for a couple of the decorations:


Shooting Stars

You will need:
Coloured tylose/ CMC paste OR fondant (plastic icing) mixed with a little tylose /CMC powder.
Tylose glue
Star cutters
Roller
Wire, cut in various lengths
Edible /non-toxic glitter


Use tylose glue to stick two stars together with a piece of wire pressed between them.


Allow to dry, then brush with glue before sprinkling glitter liberally over the surface.


(Do this on top of a piece of paper, so that you can pour any excess glitter back into the pot.)
Tap off any excess glitter and allow to dry.
 Repeat on the other side if both sides of the star are going to be visible.

Twirled Streamers

Cut long strips of paste, then wind them around a something suitable - I used long paintbrushes.
Allow to dry just a little before draping them over the edge of a tin to dry completely.


And, that (as they say in show-business) is a wrap!

Have a fantastic New Years celebration, but more importantly:
 Wishing you a wonderful, creative, happy and healthy 2014!

xxM

Tuesday, 24 December 2013

Festive Fruit Cupcakes


It's Christmas Eve, so this will be the last festive recipe I'll share with you this year. Not the last recipe for 2014, but certainly the last one with "festive fruit" .
Oh, I have more - chocolate brownies with festive fruit, cheesecake with festive fruit and shortbread with festive fruit. (Can you tell that I over-stocked on glacé cherries and candied peel??).
The combination of rich dark chocolate, gooey cherries and crunchy nuts is definitely more-ish.
But, by now - I must admit - I'm over it! Thank goodness Christmas only comes once a year ; )

Anyway, in case you're looking for something to serve this evening or tomorrow, here's the recipe…


Festive Fruit Cupcakes
Recipe by Tea, Cake and Create

Preheat oven to 180'C
Line 2x muffin pans with cupcake cases (makes 24)

Ingredients:
400g dark chocolate discs or dark chocolate cut into small pieces
80g butter
6 eggs separated
80g + 1 tbs caster sugar
80 g cherry jam / preserve
150g ground almonds
50g cake flour
50g cocoa

Melt the chocolate and butter together in a double boiler or on low power in the microwave.
Allow to cool slightly.

Sift the dry ingredients together - flour, cocoa and ground almonds.

Whip the egg whites until soft peaks form. Sprinkle in 1tbs caster sugar, then whip until stiff.

In a separate bowl, whip the egg yolks and remaining caster sugar together.
With the mixer on low speed, slowly pour in the melted chocolate/ butter, then the cherry preserve. Mix well.
Add the dry ingredients - mix until just incorporated.

Fold one spoon of the egg whites into the batter, then gently fold in the rest.
Continue folding the batter until the whites are no longer visible.


Divide the batter evenly between the prepared cupcake cases.

Bake at 180'C for 20min or until a skewer inserted comes out with moist crumbs attached.

Remove from the oven to cool slightly, then remove the cupcakes from the muffin pan.


Ganache

300g dark chocolate discs
150g whipping cream

Place both ingredients into a heat proof bowl and place the bowl over a saucepan of simmering water. The water should not touch the bottom of the bowl. Stir occasionally until the chocolate has melted and the mixture is smooth.
Allow the ganache to cool slightly - but not set; then pour over the cupcakes.


Festive Fruit Topping

Mix together-
100g mixed candied peel
160g glacé cherries - roughly chopped
80g white chocolate - roughly chopped
80g shaved almonds - toasted


Place a spoonful of the topping onto each ganache'd cupcake.


(Omit the festive fruit and you could serve them any day of the year you please!)

Have a very very deliciously merry Christmas!

xxM

Wednesday, 18 December 2013

Nutella Cheesecake


Somehow, in the past couple of years Nutella has become a pantry staple in this house.
Not (just) for spreading lavishly on bread or sneaking decadent spoonfuls, but as a quick fix for almost any sweet situation.
 Needing inspiration? Grab a jar of Nutella and oh, golly - you'll be inspired!
... I speak from experience: I literally threw these ingredients together the afternoon of the event that it was intended for - forgetting that it would need cooling and chilling time - but thankfully managed to get it in the fridge for long enough for it to work.


Nutella Cheesecake.
Recipe by Tea, Cake and Create

Prepare a 15cm square cake pan with baking parchment:
 Spray the tin with non-stick baking spray, then cross two pieces of parchment over in the pan - let the parchment extend well above the sides of the pan to facilitate removing the cheesecake from the pan once baked. Spray the parchment with baking spray.

Ingredients:
Base
250g chocolate cookies
80g melted butter

Break the cookies into small pieces, then use a food processor to blitz until finely crumbed.
Mix with the melted butter, and press the mixture firmly into the base of the pan.
Chill in the freezer for 30minutes.

Filling
250g cream cheese
250ml fresh cream
4 eggs
80ml caster sugar
300g Nutella
1 tsp vanilla extract

Beat the sugar and cream cheese together until soft, then add the eggs one at a time. Followed by the rest of the ingredients, and beat until smooth.
Poor over the chilled base and bake in a water bath for 1 hour at 160'C.


Leave in the oven to cool (with the oven door closed), then refrigerate for at least 4hours or preferably overnight.
Remove from the baking tin by first running a knife between the tin and baking parchment, then gently pull up on the sides of parchment and ease the cheesecake upwards.


Dust with icing sugar or sprinkle with chopped roasted nuts before serving.
Serve chilled.

Here's a quirky idea - print this recipe and attach it to a jar of Nutella as a sweet Christmas gift : )

 Happy holidays!

xxM

Saturday, 14 December 2013

Marbled Christmas Bauble Cookies

It was love at first sight. That's how my relationship with royal icing began.
The December 2011 issue of Good Housekeeping Magazine featured a platter of beautifully decorated  Christmas ornament cookies that had me spellbound. I had to figure out how to replicate them.
I didn't even know what I was searching for at first, but I finally found marbled royal icing tutorials through Google. And that, as they say, was that!


The background in the photograph above is the page from Good Housekeeping Magazine from November 2011 that inspired me. (The cookies in the magazine were by the incredibly talented Roxanne Floquet)

 
So, I thought I'd share a tutorial with you that replicates that first Christmas cookie that captured me:

Using an icing bag fitted with a size 1 or 2 Ateco tip, outline and flood a bauble shaped cookie with white flooding consistency royal icing :


Still using flooding consistency royal icing (and a bag fitted with an Ateco 1 or 2 tip), immediately pipe parallel lines of red royal icing across the cookie surface:


Start above the first line of red, and drag the tip of a toothpick through the icing from the top to the bottom of the cookie. Follow the curve of the bauble.


Then, clean the tip of the toothpick and drag it through the icing in the opposite direction: from the bottom of the cookie to the top.


Continue until the whole surface is marbled - remember to follow the curves of the bauble.

Set aside and allow to dry completely - it may take 24 hours - before packaging.


It can get quite addictive!


And if you want to see marbling in action from one of my very favourite cookie decorators - have a look at this video.


Happy marbling!

xxM
Thursday, 12 December 2013

Apple Crumble and Custard Cupcakes


Here's a cupcake that may not look like much on the outside, but has a heart of gold:

Moist apple cake, custard centre and a crispy crumble topping. 

Apple Crumble and Custard Cupcakes
Recipe by Tea, Cake and Create

Pre-heat oven to 180'C. Prepare muffin pans with 16 cupcake cases.

Ingredients:
220g cake flour
150g light brown sugar
150g butter
50ml oil
4 eggs
4 med sized apples; peeled, cored and diced
1 1/2 tsp baking powder
1/2 tsp baking soda
1/4 tsp salt
1 1/2 tsp cinnamon

Place diced apples in a saucepan with 1/2 cup of water. Simmer until cooked. Mash coarsely.

Sift the flour, raising agents, cinnamon and salt together.

Cream together the butter and sugar. Add the eggs, one at a time. Add a tablespoon of the flour mix with each egg to prevent the mixture separating.
Pour in the oil and mashed apples. Mix briefly.
Add in the dry ingredients. Mix until just combined.
Spoon into the prepared cupcake cases.
Bake for 18-20 minutes or until a skewer inserted comes out just-clean.


Egg custard

(Can be made up to 5 days in advance).

5 egg yolks*
2 cups (500ml) milk
1/2 tsp vanilla extract
1/2 cup white sugar
1tbs white flour

Lightly whisk together the yolks and sugar. Add the flour, mix well. Set aside.

In a medium sized saucepan, being the milk and vanilla extract to the boil.
Remove from the heat and slowly pour this into the egg yolk mixture, stirring constantly.
Return this all to the saucepan and simmer on low heat for approx 5-10 minutes - stirring constantly - until the mixture thickens enough to coat the back of a spoon.
Remove from the stove.
(If you're not using the custard immediately, stir occasionally while the custard is cooling to prevent a skin forming on top. Store in the refrigerator once cooled.)

Place in a piping bag with a long narrow-opening nozzle attached (you'll find a picture of the one I use here). Insert the tip of the nozzle into the centre of the cupcake and squeeze.
I stop squeezing when the surface of the cupcake cracks open slightly from the pressure of its new contents.


Crumble topping

50g brown sugar
50g butter, melted
80g porridge oats (uncooked)
1tbs flour
1/2 tsp cinnamon

Mix all ingredients together.
Spread on a baking tray and bake in the oven at 180'C until golden brown.

Sprinkle over the top of the cupcakes once their custard centre has been put in.
Finish off with a dusting of icing sugar.


Happy baking!

xxM

Monday, 9 December 2013

Christmas Reds

So, last week was pretty busy. Four cookie classes in 6 days; I worked out that I baked close to 700 biscuits and made over 6kg's of royal icing. This week is easier - just 30 or so mini Christmas cakes. It'll be a breeze!

Last year I was completely over the combination of red, white and green by the time Christmas day arrived, and I was determined not to use those same colours again for this year's Christmas cookies…do you think I succeeded?


Clearly not. But the addition of pale green made it seem fresher to me. And I also enjoyed working with the combination of red, white and brown.  


But next year - definitely something different!

While we're on the subject, though: let me just share with you a bit about reds. 

I usually use a combination of Red Red or Tulip Red and Super Red to get a fresh, true red like the one in the cookies above (Cake Flora or Americolor gels). 
You have to use a lot of colorant to achieve a decent red, so it's preferable to use Tulip Red which is not bitter (and to my eyes, indiscernible from Red Red). 


In the picture above, from left to right: Xmas Red, Tulip Red, Red Red and Super Red. 

Xmas Red? Not really - more like Xmas pink. But a cheery pink, at least! 


Ok, I'm off to bake some more fruitcakes. 

Happy decorating!
xxM 

Monday, 2 December 2013

Rose Water and Pistachio Cupcakes


Most of the time when I bake something new it's because I'm interested in the combination of flavors, but these cupcakes were made simply for a love of the colours: rose pink and pistachio green - has to be one of the prettiest combinations out there, right?
And ok, the cupcakes taste pretty good, too…


So, before we get swamped with this season's jolly-holly trio of red, white and green, here's some pastel pleasure:

Rose Water and Pistachio Cupcakes.
Recipe by Tea, Cake and Create

Vanilla Cupcakes
Preheat the oven to 180'C
Line 2 muffin pans with cupcake cases - makes 16-20 depending on the size of your muffin pans

200g caster sugar
200g flour
1 1/2 tsp baking powder
1/2 tsp baking soda
1/4 tsp salt
75g butter
3 med eggs
250 ml cream.
1tsp Vanilla extract

Sift the dry ingredients together (incl the caster sugar).
With an electric mixer on low speed, mix the butter and dry ingredients together until finely crumbed.

Lightly beat the cream, eggs and vanilla together.
Pour this into the flour mixture, beat on low speed until just combined.

Bake at 180'C for approx 18 minutes until a skewer inserted comes out just-clean. (Don't over bake!)


Rose Water Swiss Meringue Buttercream.

5 egg whites
250ml (1 cup) caster sugar
300-350g butter
A few drops of rose water essence.

Put the egg whites and sugar into a mixing bowl, and place that over a saucepan of simmering water. The bottom of the mixing bowl must not be in contact with the water, and the water should just be simmering.

Whisk constantly, until the sugar granules have dissolved and the mixture is hot to touch.

Move off the stove and to the mixer.
Using the whisk attachment, whip until it forms a thick and glossy meringue.

When the mixing bowl feels neutral to touch, change over to the paddle attachment and add the butter one cube at a time, beating on low-medium speed.
It may curdle, but just keep whipping until it reaches a satiny smooth consistency and holds its shape. Add the vanilla extract. I stop adding butter at about 300g (sometimes even 250g) - as soon as the icing is firm enough to hold it's shape when piped. Add a few drops of rose water essence - be careful too much is over-powering. 

(If you are having SMB issues, see this post by Sweetapolita)

Pipe onto cooled cupcakes.
Sprinkle with chopped pistachio nuts. 


Now, focus... back to the Christmas baking….

: )
xxM

Saturday, 30 November 2013

In the Pink

If I were to catalogue things that are completely useless (and wouldn't that be a completely useless exercise?!) at the top of the list: the last 6 months on your passport.

So, yesterday while I should have been creating something delicious in my kitchen to share with you, I was at Home Affairs renewing my passport (which expires in July!) instead. Oh, well. At least it's now done for another ten 9.5 years!
But I'll have to share some colour theory with you instead of a new recipe. Ok?

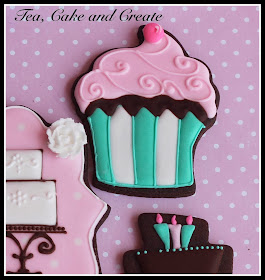
These were the colours I was working with in the "Cake and Cupcakes" cookie class, and I absolutely loved the colour scheme  - but it took a bit of finessing to get it just right:
Pink, teal, white and brown.  


Here's Teal vs.Turquoise:
                                                                                                   (Americolor / Cake Flora gel colours).


Both are gorgeous colours; the teal is just a tinge more green.
But not the tinge of green I wanted. So, I created another teal using turquoise and a drop (yes, that small) of mint green.


And as for the pinks - 
Here's Deep Pink vs. Soft Pink:


Deep Pink on the left - cool (blue) undertone. Soft Pink on the right - warm (yellow) undertone.

It's really helpful to figure that out because - as a rule of thumb - sticking to colours with the same undertone (warm or cool, not both) in a project leads to a harmonious visual effect.
(And oh, how I love a harmonious visual effect!)


Boldly mixing cool and warm palettes can create an off-beat effect.


And using a predominance of one with contrasts of the other can create both interest and balance.

Just a little something to bear in mind if colour choices are stumping you : )


Happy Creating!

xxM

Wednesday, 27 November 2013

Amarula Chocolate Torte


Ok, so I made my own birthday cake. Who else was going to do it? My husband's kitchen skills don't stretch to chocolate cakes. Or any cakes. Or anything much besides steak and washing dishes - both of which he does really well, though!! (Don't worry - he'll never read this).
So, buy a cake? Uh, no.
And you know what - it's my party, I can bake if I want to : )


{torte (tôrt, tôrt)          n. 
A rich cake made with many eggs and little flour. Usually containing chopped nuts.
[German. Perhaps from Italian torta, cake, tart, from Late Latin torta, a kind of bread.]}


Amarula Chocolate Torte.
Recipe by Tea, Cake and Create

Preheat oven to 180'C
Grease and line 3x 6in (15cm) pans or 2x 8in pans.

400g dark chocolate discs or dark chocolate cut into small pieces
120ml Amarula
6 eggs separated
80g butter
80g + 1 tbs caster sugar
150g ground almonds
50g cake flour
50g cocoa

Melt the chocolate and Amarula together in a double boiler.
Allow to cool slightly.

Sift the dry ingredients together - flour, cocoa and ground almonds.

Whip the egg whites until soft peaks form. Sprinkle in 1tbs caster sugar, then whip until stiff.

In a separate bowl, cream the butter and remaining caster sugar together. Add the egg yolks and beat until light and creamy.
With the mixer on low speed, slowly pour in the melted chocolate /Amarula; mix well.
Add the dry ingredients - mix until just incorporated.

Fold in one spoon of the egg whites, then gently fold in the rest.
Continue folding the batter until the whites are no longer visible.

Divide the batter evenly between the prepared cake pans.

Bake at 180'C for 35-40minutes, or until a skewer inserted comes out with moist crumbs attached.

Allow to cool in the pans before turning out onto a cooling rack.


ChocolateMousse Icing
Recipe by Tea, Cake and Create

(This recipe produces enough icing to spread between the cake layers and to cover the outside of the cake. Halve the ingredients if you'll be leaving it - the cake! - naked.)

150g butter
2x 250g tubs cream cheese
100g icing sugar, sifted
50g cocoa powder, sifted
2-4 tbs fresh cream or milk
1 tsp vanilla extract.

Beat the butter until soft and creamy, add the sifted icing sugar. Mix well.
Add in the cream cheese. Mix until just combined.
Then add the vanilla and sifted cocoa. Mix until incorporated.
If the icing is too stiff to spread on a cake - add the fresh cream / milk until it is softer.

Spread icing onto the cake once it is completely cool.


Try to keep some cake for the next day - it gets even better with age. As good things should ; )

xxM

Friday, 22 November 2013

Blueberry Yoghurt Cupcakes

We have a (small) blue vs. purple issue in this family. I won't tell you who I think started it, but I will say that it has something to do with my husband saying that Tinky Winky is blue, while I believe he's purple. So now my son has blue/ purple confusion, and I'm second guessing myself and wondering if what I see is what you see … and is what I see purple... or is it blue?


And why are blueberries called blueberries when they're actually purple berries?
Aren't they??


Blueberry Yoghurt Cupcakes
Recipe by Tea, Cake and Create

Pre-heat the oven to 180'C
Line 2x 12 hole muffin pans with cupcake cases
(Makes 24, but ingredients for cupcakes and icing can be halved to produce a dozen iced cupcakes).

Ingredients:
1 cup double thick greek yoghurt  (1 cup = 250ml)
2 cups flour
2 cups white sugar
2/3 cup vegetable oil
4 large eggs
1 1/2 tsp baking powder
A few drops of lemon extract - optional
1 cup fresh blueberries, plus extra for garnish*

*frozen blueberries will do, but they don't quite have the same burst-in-your-mouth flavour as fresh ones do.

Beat the eggs and sugar together on medium-high speed until pale and fluffy.
Mix in the oil and yoghurt (and lemon extract if you're using it).
Sift in the flour and baking powder. Mix until just combined.
Dust the blueberries with flour, then fold them into the batter.
Scoop batter evenly into prepared cupcake cases.

Bake at 180'C for approx 20minutes or until a skewer inserted comes out just-clean (do you know what I mean?!)


Mascarpone Cream Icing


2 x tubs / 2 x 250g mascarpone 
1 cup (250ml) whipping cream (35-40% fat content)
1/2 cup sifted icing sugar


Chill the mixing bowl and whisk attachment in the freezer for 20 minutes. 
Place all ingredients into the chilled bowl, and whip until stiff. 

Pipe onto cooked cupcakes. 


Purple, right?!

xxM 

PS. for another take on blueberry cupcakes - see here